" Blog da Horta Biológica: Orchard
Mostrar mensagens com a etiqueta Orchard. Mostrar todas as mensagens

How to Make Fruit Liqueur | How to Make Jam with the Leftover Fruit of the Liqueur

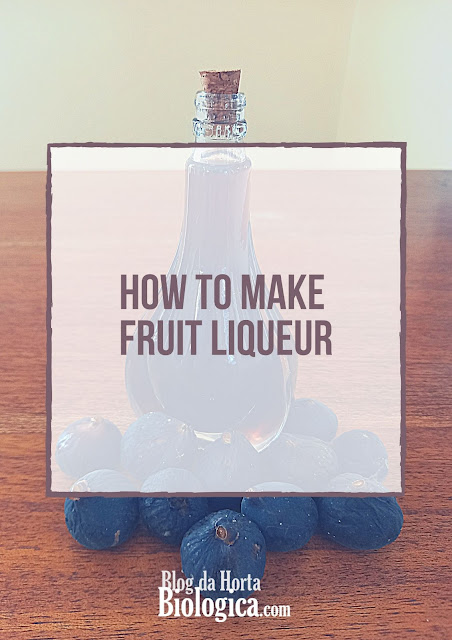
There are many ways to preserve fruit, but none will be as noble as liqueur! In addition to keeping for many years, it is an excellent gift to give to family and friends, as well as for personal consumption, and can be enjoyed after a meal.

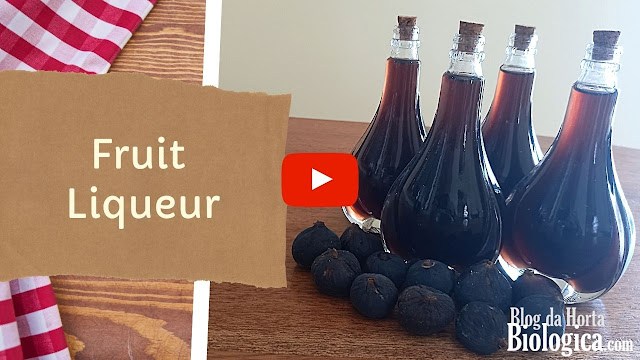
The liqueur we made for this post was made with organic black figs from our trees, but the same method can be followed for several other fruits. In addition to the liqueur, we also show you how to make jam with the fruit leftovers. Nothing is lost...

At the end of this post, check out our educational video where we show you how to make the liqueur and the jam step by step.


So let's see first how to make the liqueur.


Ingredients


  • 1Kg Black figs
  • 1L Cachaça (it does not have to be a specific brand, but it must be of good quality)
  • 1L Water
  • 1Kg Brown Sugar
  • 2 or 3 Cinnamon sticks (optional)


Materials


  • 1 Large glass jar with lid
  • 1 Sieve
  • 2 Large containers
  • 1 Tablespoon or potato masher
  • 1 Wooden spoon
  • 1 Large pan
  • 1 Funnel
  • Pre-sterilized glass bottles to store the liqueur


How To Do It


1st Phase: Fruit Maceration


  1. Harvest the figs. If it is not possible to make the liqueur on the same day, the figs must be refrigerated.
  2. Cut the figs into 4 pieces and place them inside the glass jar.
  3. Cover the figs with Cachaça.
  4. Cap and shake the jar well.
  5. The jar should be kept in a cool, dry place for 30 days (maceration time).
  6. During the 30 days the jar must be shaken at least once a day. The ideal is 3 times a day.


2nd Phase: The Liqueur Preparation


  1. After 30 days, use a sieve to strain the liquid into a large container.
  2. With a spoon or potato masher, squeeze the fruit to remove as much liquid as possible. Reserve the fruit.
  3. In a pan, add 1kg of brown sugar and 1L of water. Mix and boil for 10 minutes. Here you are preparing a syrup that will add sweetness to the liqueur.
  4. Once ready, add the fig liquid to the syrup.
  5. Mix well.
  6. Optionally, cinnamon sticks can be added to the mixture and stirred for a few minutes, removing the sticks before pouring the liqueur into the bottles.
  7. Use a funnel to store the liqueur in glass bottles.


Now, let's see how to make jam with the fruit leftovers.


Ingredients


  • The figs used to make the liqueur
  • 250g Brown sugar


Materials


  • 1 Pan
  • 1 Wooden spoon
  • 1 Hand blender
  • 1 Tablespoon
  • Pre-sterilized glass jars to store the jam


How To Do It


  1. Place the fig leftovers in a pan.
  2. Add 250g of brown sugar.
  3. Mix well.
  4. Let simmer for 20 minutes.
  5. After 20 minutes, mix with the hand blender.
  6. Stir a little.
  7. With a spoon, immediately transfer to the glass jars and cover.
  8. Keep the jars upside down to create vacuum (you know it's under vacuum when you hear the lid clicking and it gets sucked down). If a jar doesn't vacuum, it should be stored in the fridge and consumed first.
  9. Both liqueur and jam must be stored in a cool dry place.


This sweet is not exactly like a jam. It is thicker and also has a slight Cachaça flavor, but it no longer contains alcohol, as it evaporates during boiling. It's a great sweet to fill cakes, but also to put on cookies or mix in yogurt.

And so, nothing is lost, everything is transformed!


If you make these recipes at home, feel free to share experiences, here on the blog or on our Youtube channel!


Here is our video!


How to Make Fruit Liqueur  | How to Make Jam with the Leftover Fruit of the Liqueur


Olive Oil: The Soul of Food | The Properties and Production of Olive Oil, Olive Tree to Table!

The soul of food, green gold, and even gold for the poor! It has been called many things but certain is that olive oil is an indispensable element in food and its properties have been known and appreciated since ancient times. Olive oil was used not only in food, but also as an element of medicine and religious rites, as a beauty ingredient, as fuel for lighting and heating, and even as a lubricant for hardware and agricultural tools. As versatile as it gets!

Many years ago, in the early days of our blog, we launched the post Olive Harvest, where we showed, in a simple way, how the harvest is done. In this post we will talk about the benefits attributed to olive oil and show how it is produced. At the end of the post, watch our video where we show all the stages of olive oil production, olive tree to table.


Properties and Production of Olive Oil


What is Olive Oil and What Kind of Olive Oil to Eat?

Olive oil is the most characteristic element of the Mediterranean diet, which is considered one of the most complete and healthiest in the world. In such a way that, in 2013, the Mediterranean Diet was declared Intangible Cultural Heritage of Humanity by UNESCO.

Olive oil is obtained from the pressing of olives. It is widely used, not only in cooking but also in natural soap and cosmetics. Curious? Check out our video Olive Oil Soap: How to Make It and Its Benefits.

The healthiest olive oil is cold-pressed extra virgin olive oil. In this method, the olives are pressed right after they are picked and do not go through any kind of industrial processing, which makes this type of olive oil keep its nutrients and be the best in food and health.

Olive oil can be consumed immediately or can be left to mature. The taste and acidity of olive oil depends on several factors, such as air temperature, rainfall, humidity, how mature the olives are when they are harvested, and how long the oil has been maturing. When consumed immediately it can have a so-called "green taste". The best olive oil should have an acidity of less than 0,8%.


Benefits and Properties of Olive Oil 

Olive oil is a healthy fat and its daily consumption has several benefits for both physical and mental health. Although there is some discrepancy regarding the daily quantity to intake, overall the recommendation is between 1 to 3 dessert spoons per day.

Although olive oil can be used for cooking and seasoning, it is recommended that preference be given to consuming olive oil in its purest state, i.e. without heating, so that it retains maximum nutritional properties. However, despite this recommendation, it is important not to be extremist and to remember that olive oil is a very versatile oil that can and should be used in all ways that benefit our health. 

Olive oil can also be mixed with herbs in food to further enhance its properties, and can also be macerated with herbs and plants for other medicinal purposes. To learn how, check out our video How to Make a Maceration - DIY Herbal Infused Oil.


Now check out our infographic with the benefits and properties attributed to olive oil.


Olive Oil Properties de Blog da Horta Biológica


Olive oil is one of the anti-inflammatory foods. However, it is important to remember that the consumption of olive oil alone is not enough to obtain all its benefits. It is very important to eat a healthy and balanced diet. For detailed information about these foods, you may like to read our post Anti-inflammatory Foods For Disease Prevention and Strengthening the Immune System


Olive Oil Production, Olive Tree to Table!

Now that we've spoken about what olive oil is, what kind of olive oil to consume, and what properties it has, we are going to show all the production phases. Have you ever seen how the olives are harvested and how the oil is extracted in the press? Watch our video where we show you everything!


VIDEO - Olive Oil: The Soul of Food | The Properties and Production of Olive Oil, Olive Tree to Table!


How To Make Fruit Fly Traps | Homemade Natural Recipes

To protect the fruit from pests and obtain a higher yield with quality fruit it is important to set traps on the trees. Pests can cause damage to the plants and are responsible for the loss of a large part of the production. In extreme cases, even total loss. Fortunately, in organic farming there are several ways to fight pests naturally. In this post we will show how we make homemade traps to fight fruit flies in the orchard. At the end of the post, you can also watch our educational video with step by step instructions on how to make these traps.


What Fruit Fly Traps Are Made Of


Fruit fly traps consist of a liquid mixture of sweet smelling or strong smelling ingredients so that the flies are attracted to the smell of the liquid and not the smell of the fruit. The traps can be made at home using natural ingredients, making them a simple and economical way to fight pests. 

Some examples of attractants are:

  • Fruit juice (the riper the better)
  • Rotten fruit juice (can be from the tree itself or other fruit), i.e. fruit that has fallen and rotted or has been attacked by insects and can no longer be eaten
  • Vinegar
  • Water with sugar
  • Water from cooking codfish or other fish

The traps can be placed in bottles, which you can buy at gardening stores, or you can use plastic bottles. This is also an excellent way to reuse these bottles. Both types of bottles have holes that allow the insects to enter. These bottles are then hung on the trees to catch the bugs that attack the fruit.


When to Use the Traps


These traps should be set when the fruit is ripe and begins to release its sweet smell that attracts fruit flies and other insects. 

There are many possible recipes and in this post we will share the two that we usually make at home.


How to Make It


Part I - Preparing the Bottles


We start by preparing the bottles. For these traps we use 1.5L PET bottles.


  1. We start by placing a yellow tape near the top of the bottle. This step is optional but useful, as the yellow color helps to attract the insects.
  2. Under this tape we open four holes with approximately 1cm in diameter. For this task we use a drill, but a hot iron can also be used.
  3. To hang the bottle on the tree, we cut two more holes near the mouth of the bottle, through which we then pass a string. Some people use wire, but we prefer to use a string, because the wire can open wounds on the bark of the tree, for example if the orchard is located in a windy area and the bottle is constantly shaken by the wind. 


Thus, the bottles are ready to receive the insect-attracting liquid. 


Part II - Preparing the Liquid


Now we move on to the attractive liquid recipes. 


Recipe 1 (Made with fruit from the tree itself)


  1. We start by extracting the equivalent of 250ml of fruit juice.
  2. In a container we add 200ml of water + 50g of sugar + the 250ml of fruit juice + 4 TBSP of vinegar.
  3. We mix everything together.
  4. With the help of a funnel we pour into the bottle.


Recipe 2 (Made with banana)


  1. In a blender, we start by mashing one large or two medium bananas. They can be mashed with or without the peel.
  2. Then we add 200ml of water + 50g of sugar + 4 TBSP of vinegar.
  3. We mix everything.
  4. Finally, we pour into the bottle.


The amount of liquid should not exceed 1/4 of the bottle's space. Each of these recipes has sufficient quantities for just one bottle. If you want to prepare two bottles at once you should double the quantities. 


How Traps Work


Flies and other insects are attracted to both the smell of the liquid and the yellow color. They get in through the holes and can no longer get out. Thus, they end up drowning in the liquid.


How to Use the Traps


The bottles should be hung:


  • At least 1.5m high. It also depends on the height of the tree, as the traps should be about the same height of most of the fruit, meaning they should be high enough to catch the insects.
  • South-facing (if you live in the northern hemisphere). When exposed to heat the liquid in the bottles rots faster and the smell becomes even stronger and more attractive.
  • Changed weekly. It is important to keep an eye on the traps, because over time the volume of the liquid, as well as its efficiency, diminishes and becomes less attractive, so it needs to be replaced with new liquid.


The number of bottles to place depends on factors such as the size and configuration of the orchard. Some people place only one or two traps per hectare. Some people place a trap for every certain number of trees. We like to set one trap per tree, since our orchard is small and the trees are more protected. Also of note is that these traps we do, do not stink at great distances so as not to disturb the neighbors. If you make traps that are too smelly you can place fewer traps in the orchard.

A week after setting the traps, the amount of bugs caught can already be seen.


This is how we can keep our orchard fruit healthy and tasty!


For a better understanding of all these steps, take a look at our educational video now, and if you haven't subscribed to our YouTube channel yet, take the opportunity to do so, if you don't want to miss any of our videos.


We hope you find it useful.

Xo Xo from the gardeners!


How to Make Fruit Fly Traps | Homemade Natural Recipes


Soap and Vegetable Oil Spray - Natural Insecticide - Garden and Orchard Pest Control

One of the principles of organic farming is to let biological pest control happen. This consists in letting the beneficial insects attack the insects that harm the plants, such as ladybugs eating aphids. However, this biological pest control is not always enough to protect crops. Hence, it becomes necessary to use natural products to fight the pests. 

Fortunately, there are many natural homemade recipes. You can also find in our blog the recipes for Onion Bug Spray and Coconut Soapy Water. In this post we will talk specifically about Soap and Vegetable Oil Spray that can easily be made at home and then applied to the vegetable garden, flower garden, orchard, and also to indoor plants. At the end of this post you can watch our educational video where we show you how to make this spray step by step.


Benefits of Soap and Vegetable Oil Spray


Soap and vegetable oil spray has long been used to combat pests because of its many benefits:

  • It is easy to make at home
  • The cost of making this spray is very low
  • It is very effective in fighting pests
  • It is natural and environmentally friendly


Recipe


To make this spray, we use 100% coconut soap with no superfat, as it is highly effective in fighting pests. See in this post how to make this soap at home. If you don't want to use this soap, you can make the same recipe with Offenbach soap or potassium soap. 


Ingredients


  • 10 L of water (can be tap water or rain water)
  • 200g of 100% coconut soap with no superfat
  • 100ml vegetable oil (we used olive oil, but it can be another oil. Sunflower oil also works very well)


Materials


  • 1 large pan with 10 L capacity
  • 1 big spoon 
  • 1 grater 
  • 1 funnel
  • 1 jug (to help pour the liquid)


Method


  1. Grate the soap
  2. In a pan, over low heat, place the soap scraps in 5L of water and stir until the soap is well diluted
  3. Gradually add the vegetable oil, stirring constantly
  4. Gradually add the other 5L of water, and keep stirring
  5. Turn off the heat and let it cool
  6. With the help of a funnel and a jug, pour the liquid into the container where it will be stored
  7. Label with the name and date it was made. It can be used for up to 2 years.


How to Apply


The soap and vegetable oil spray should be used as an insecticide, not as a repellent. It should not be sprayed on plants if no pests are present. This spray should be applied directly to soft-bodied insects such as aphids, lice, mealybugs, moths and whiteflies. Soap and oil damage the waxy layer that protects them, asphyxiating them and drying out their airways.

Excessive use can damage the plants, since the oil can block the plant's breathing pores. Application should be done  once or twice a week.

Spraying should always be done in the early morning or evening to avoid the hours of greatest heat. It is also important to avoid spraying on windy days, in order to avoid the waste of spray and to guarantee a good application over the insects.


VIDEO - Vegetable Oil and Soap Syrup - Natural Insecticide - Pest Control for Vegetable Garden and Orchard


Coconut Soapy Water For Garden and Orchard Pests

Soapy water made of coconut soap is a very effective natural insecticide and fungicide. We use this soapy water to spray the garden and fruit trees and today we will share with you the recipe which is actually very easy and quick to make. It is made in a few minutes, just add 2 ingredients and it is ready to use! Make sure you watch our educational video at the end of the post.


Let's see what it takes to make this soapy water.


Ingredients

  • 100% coconut soap preferably without superfat, as this type of soap is the most effective against pests. If you don't know what we are talking about, check out this post.
  • Water (preferably distilled).


Materials 

  • 1 Grater
  • 1 Glass
  • 1 Glass container (heat resistant)
  • 1 Spray bottle


How To Do It

  1. Grate the coconut soap.
  2. Heat the water in the microwave. It should be warm, but there is no need to boil. You can heat enough water for each use and you can use a glass for measuring.
  3. Dissolve the soap in the water at the ratio of 1-1, that is, for each glass of water one tablespoon of grated soap.
  4. Let it cool and put the mixture in a spray bottle.


How To Apply

  • It should be applied in the morning or evening, avoiding the hours of greatest heat.
  • It should be sprayed on stems and leaves, not forgetting the back of the leaves where the insects are in greatest quantity.
  • Spray on soft-bodied insects such as aphids, mealybugs, caterpillars, lice, and moths.
  • Do not spray on beneficial insects to the garden, such as ladybugs.
  • Spray 1 to 2 times a week as needed.


Simple, quick, efficient, and totally natural! The best! :)


Check out our video where we show you in a practical way how to make and apply this soapy water.


VIDEO - Coconut Soapy Water | Natural Insecticide


How To Make Coconut Soap – Cold Process Step-by-step and Its Various Ways of Use

Coconut soap is an excellent ally in natural hygiene. We love to make coconut soap both for cleaning and to use as a natural insecticide. Therefore, today we share the recipe of coconut soap just as we do it at home, as well as its various ways of use. It's a soap for both house and garden!

The way of making coconut soap for cleaning is different from the way of making coconut soap for skin care. The recipe we are going to share in this post is of soap for cleaning only! It cannot be used as face wash or for showering and we are going to explain the reason why.

At the end of this post you can watch our educational video where we show the step-by-step to making coconut soap.


Before we jump into the recipe we are going to talk about soap and safety measures. This info is very important, so in case you never made soap before don't skip this part and read everything very carefully.


What Is Soap?


Soap is a salt of fatty acids that is obtained through the chemical reaction between a fat and alkali. This reaction is called saponification. 

The mandatory materials for making soap are alkali (sodium or potassium hydroxide), fats (oils, butters and waxes) and water (distilled - do not use tap water).


Cold Process


This recipe is made by the cold process, in which all the ingredients are handled at low temperatures, in contrast to the hot process in which a crock pot is used.
In the cold process it is easier to control the final result. However, the time to cure is longer.


What Is The Cure?


The cure is the necessary time for soap to lose water and stabilize the pH. The curing time for a 100% coconut soap for cleaning is 4 weeks.


How To Know The pH?


Soap, in a cold process, is alkaline and the pH varies between values 8 and 10. During the curing process, pH measuring strips can be used to know whether the soap needs to cure for a longer time.

For more info, visit our post: How To Test the pH of Soap


Superfat

Superfat is the extra fat in soap so that it is emollient and doesn't hurt the skin. A coconut soap for cleaning doesn't have superfat in its formula. This means that coconut soap for cleaning is aggressive for the skin, for it has the capacity to remove its natural fat layer. On the other hand, it is excellent for cleaning due to its detergent power and capacity to remove grease and dirt. Thus, we can't emphasize enough that this recipe we are giving you is to use only for cleaning or as a natural insecticide.

If you want to know how to make coconut soap for the skin, visit our post: Coconut Soap For The Skin: Benefits and How To Make It


Mandatory Safety Equipment


Due to the handling of caustic soda, it is necessary to take special care. This is the mandatory safety equipment:

  • Long-sleeved lab coat 
  • Rubber gloves
  • Mask
  • Safety goggles
  • Closed footwear


Ingredients For This Recipe


  • 387g Coconut oil
  • 135g Distilled water
  • 70g Caustic soda - Sodium Hydroxide 99% (NaOH)
This recipe will give you about 600g of soap. Weight will always vary after curing.


Material Needed To Make This Soap Recipe


  • 1 Kitchen scale
  • 1 Stainless steel pan (never use aluminum as it reacts with soda)
  • 3 Measuring containers (glass, stainless steel, or plastic - do not use aluminum) 
  • 1 Feeding syringe (optional to measure the oil without spillage)
  • 1 Stainless steel spoon
  • 1 Silicone spatula
  • 1 Digital Laser Thermometer
  • 1 Hand blender (exclusive for this purpose)
  • Cling film
  • 1 Tray
  • 1 Wooden or Silicone mold (you can make bar soap or individual doses) 
  • 1 Soap cutter (optional). Will be useful if you make bar soap. 
  • 1 Cloth
  • Ice + 1 large container for cold water bath*

* This container is optional, as the cold water bath can also be made in the sink, if it has enough space.


Important Safety Rules


  • Work without distractions. Do not eat, drink, smoke, watch TV, listen to radio or answer the phone. Have no children and pets around. 
  • When weighing ingredients, always round the values down, never up.  
  • Never use aluminum, as it reacts with caustic soda.
  • Handle the hydroxide in a well ventilated area, using the safety equipment. 
  • Have vinegar at hand because, in case of spillage, it cuts the effect of soda.
  • Wash utensils only 24h later. Use gloves, as it will still be very caustic.


Step-By-Step (Video At The End)


  1. Gather all the material.
  2. Weigh the ingredients.
  3. Put the oil on the heat.
  4. While the oil is heating up, very carefully add the hydroxide over the water, never the other way around! 
  5. Dissolve the hydroxide with a stainless steel spoon. Never aluminum!
  6. Measure the temperatures of each solution and use a cold bath to control the temperatures. 
  7. As soon as both solutions are at 45ºC (both must be at the same temperature or with a maximum difference of 10ºC), add the water to the oil. Never the other way around! 
  8. Mix with the hand blender (exclusive for this purpose) until reaching the trace.
  9. Pour the batter into the mold and with the help of the tray shake the mold to remove air bubbles that might be in the batter.
  10. Wrap the mold with cling film and a cloth to help maintain the temperature. 
  11. Isolate for 4h, without disturbing, until it hardens. 
  12. After 4h unmold and proceed to cut (if it's a bar). For unmolding it is advisable to wear gloves.


What Is the Trace?


The trace is the point in the soap making process when oil and lye water have emulsified, that is, the point where water solution and oil mix together and form a viscous batter in which it is possible to identify lines (trace) when passing the spatula or hand blender through. 


How To Store?


During the 4 weeks of curing of coconut soap, the soap bars should be stored in a place without direct sunlight and without dampness. The bars must be rotated, so that they can cure evenly.

It is very important to make a label with the date the soap was made and the approximate date of the cure, for better guidance.

The soap should only be wrapped after it has cured, using natural materials. Paper, fabric, cardboard or cotton bags can be used, so that the soap can maintain its quality for a longer time. The first sign that the soap is deteriorating is when yellow stains appear with a rancid odor.

If the soap is used immediately after the cure, it should be placed in soap dishes, so that water can drain and the soap can last longer. If left in water, the soap will breakdown more easily.


Some Suggestions To Store Soap


How To Use This Soap?


Coconut soap for cleaning can be used in the following ways:


Dishwashing
Just wipe a damp sponge on the soap and wash the dishes as usual. Wear gloves to protect the skin due to the detergent power of this soap, as mentioned previously. 


Laundry
Grate the soap and place the necessary dose in the detergent compartment of your washing machine. If you grate the soap all at once, wear gloves to avoid intense contact of this soap with the skin.


Natural insecticide
To protect your garden from pests, grate the soap and add 1 TBSP of grated soap to 1 cup of hot water. Mix it well and spray onto soft-bodied insects such as aphids and mealybugs. Spray once or twice a week avoiding the hours of greatest heat. More details in our video Coconut Soapy Water.


Materials We Use And Recommend For Their High Quality


How To Do Summer Pruning - Simple and Practical Guide For Green Pruning

In this post we are going to talk about summer pruning, also known as green pruning, on fruit trees. The trees we pruned for this post were citrus trees. The principles of green pruning are the same for all trees but it is important to know that citrus trees require less pruning than other trees. If you cut too much they will take a long time to recover and bear fruit again. Citrus trees are perennial, which means that they are evergreen and their leaves don't fall, so they don't have a real period of dormancy. The ideal time for pruning citrus trees should be somewhere between harvesting and the new flowering period, which happens during the spring. Still, green pruning can be done. Although there are several types of pruning, which we will talk about in another post, green pruning must be very light, just to do a little cleaning to the tree. Whether your trees are young or mature you must keep an eye on them to make sure they keep productive and healthy.

We've created this green pruning guide so you can prune your trees in a safe and careful way. For a better understanding make sure you watch our educational video at the end of this post.


When To Do Green Pruning?


Although  we have mentioned that it's done in the summer, there's another curiosity. Some people organize their agricultural tasks according to the moon phases. This is an ancient practice. Usually we don't do it, except for pruning. Sap flows low during the last quarter of the moon, so your trees are less likely to lose sap after cutting. Pruning should be avoided on rainy days, as well as in the early hours of the day before dew as dissipated, to avoid the accumulation of water on the cuts, which could cause the appearance of fungi.


What To Use For Cutting?


In a pruning work, depending on the thickness and height of the branches, you might need these tools: 
  • Hand pruner
  • Lopper
  • Handsaw
  • Telescopic pruner for high trees
  • Chainsaw or reciprocating saw for thicker branches
Bearing in mind that this is a light pruning, you might only need pruning shears and, eventually, the handsaw.

Here are some links for you to see the tools in case you don't know them.


Hand Pruner 
Lopper
Handsaw 
Telescopic
Chainsaw
Reciprocating


Other Important Materials

  • Gardening gloves
  • Ethyl alcohol and a cloth for disinfecting the material

The pruning material must always be sharpened and disinfected before using on each tree, in order to prevent a diseased tree from passing diseases and pests onto other healthy trees. 


What To Cut?


It is always important to remember that green pruning is not a major pruning work, but only a small cleaning work of the tree. Before cutting, you must examine the tree to identify:

  • Branches growing inside the crown
  • Intersecting branches
  • Dead, diseased, and damaged branches and leaves
  • Sucker branches originating from the trunk and the rootstock 
  • Branches that are too long and you might want to shorten


Why To Cut?


Branches that grow inside the crown have to be cut to open the center of the tree. Excess of branches makes each of the branches weaker. By choosing the best and cutting the weakest, the branches will be stronger to support the weight of the fruits. In addition to this, more space is created for better air circulation, for sunlight to reach all fruits, and for having easier access to the inside of the crown in case of spraying against pests and diseases. Anyways, an airy, lit crown helps a lot to prevent the formation of fungi and, consequently, to reduce the need for spraying. Cutting the branches that grow inside also allows to choose and balance the shape of the crown over time. Remember that horizontal branches are more productive, so try to cut vertical branches instead.

Intersecting branches compete with each other and impair both growth and fruiting of each other. Those growing towards the center of the crown should be cut and those growing outside should be favored, as they will contribute to the formation of the crown and will be more productive for their fruits will have better sun exposure.

Dead, diseased, and damaged branches are also useless. Damaged branches can be a gateway for pests and diseases, so cut them right away.


Suckers are very vigorous, vertical, little branched, and can sprout from both trunk and rootstock.


  • Suckers branches from the trunk are useless and hinder the growth of the tree. The tree needs one sturdy trunk and these sprouts consume nutrients, reducing the productivity of the branches.
  • Sucker branches from the rootstock, just like the ones sprouting from the trunk, reduce fruit yield. They grow extremely fast and suck the nutrients that should be consumed by the bearing part of the trees.  

Branches that are too long become weaker and risk breaking when supporting the weight of the fruit. Cutting these branches makes them stronger while allowing you to define the layout of the crown.


How To Cut?


Suckers can be gently removed by hand if they are small and newly formed or with pruning shears if they have woody stems.

Other branches must be cut at the branch collar swelling, that is, the swollen part where the branch meets the trunk. This is a favorable area for healing. If you cut it right and the collar is left intact, the wound will seal more effectively. This is also crucial to protect the trees against pests and diseases. For thinner branches use the hand pruner. For thicker branches use the lopper.

It is also common to find healthy and dead twigs on the same branch. In this case, cut the dead twig back where it meets the branch.

The ideal cut must be precise and carried out at once, with an angle of approximately 45º. Doing this avoids the accumulation of water, which can cause the rotting of the branch and the appearance of fungi.

After pruning, a sealing paste should be applied to the cuts, so that they heal more quickly and are not exposed to the elements that can cause diseases. Use a paintbrush and apply the paste over the stub and around the edges to ensure it covers the whole cut area.

In our video you can see exactly how to cut and the quantity of branches that were removed from one single tree.

The summer is out there, so...get to work! :)


VIDEO - How To Make Summer Pruning