" Blog da Horta Biológica: Zero Waste
Mostrar mensagens com a etiqueta Zero Waste. Mostrar todas as mensagens

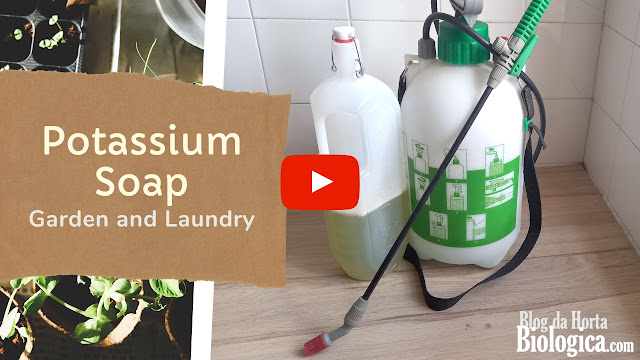
Potassium Hydroxide Liquid Soap for Garden Pests and Laundry

At the request of our Azorean readers, we're going to teach how to make potassium hydroxide / coconut soap for garden and orchard pests... and more!

First of all, we'd like to thank our readers for following us and trusting in our work, and we'd like to send a big hug to those of you who follow us from the wonderful islands of the Azores!

At the end of this post, you can also watch our educational video where we show you in detail how to make this soap.


For this post, we've formulated a soap that, in addition to having only only a few ingredients, is very effective at fighting pests in the garden and orchard, as well as washing clothes in the home laundry.

Let's start by looking at the ingredients and understanding why each one is used.


Ingredients


  • 141g Cold-pressed extra virgin coconut oil
  • 94g Extra virgin olive oil
  • 60,11g Potassium hydroxide (KOH), 90% pure *
  • 180,32g Distilled water


* Potassium hydroxide is highly hygroscopic, which means it has a strong ability to absorb moisture from the air. For this reason, as soon as it is weighed, it should be immediately sealed in its container, which must be well stored to prevent its deterioration. After sealing the bottle, we place it inside a tightly closed bag and store it in a cabinet to avoid contact with moisture. See the images in the video for a better understanding.


If you don't have a precision scale, round down, never round up.


Important: This soap does not have super fat, so it is not intended for use on the skin!


Why These Ingredients


First of all, it's important to remember that all the ingredients must be of high quality! Sometimes, when the soap is not made for skin use but for pests and laundry, there is a temptation to use low-quality oils. In this case, we strongly advise against it, since the purpose of this soap is also to nourish and care for the plants. 

On the other hand, we also want to stress that this formula has been calculated on the basis of pure oils. Each oil has its own saponification index, which means that if dubious oils are used (i.e. oils that are not truly extra virgin), the result could be a fiasco.

If you've never made soap before and aren't familiar with the process or the technical terms we are using, please read our post first: How To Make Soap.


Let's take a look at each of the ingredients:


  • Cold-pressed extra virgin coconut oil: coconut soap is extremely effective in controlling garden pests (find out more in our post Soap and Vegetable Oil Spray). Additionally, coconut is highly nutritious and is used as an organic fertilizer for the healthy growth and development of plants.
  • Extra virgin olive oil: the oil can be plain or macerated with pest-repellent plants such as peppermint, rosemary, thyme, etc. Find out more about macerations in our post How To Make a Maceration and more about plants and their uses in our book The 5 C's of Aromatic and Medicinal Plants. The use of olive oil in this formula has two functions. One is to add more beneficial properties to the soap, and the other is to achieve a final consistency that is easier to work with, since 100% coconut soap is much thicker and more difficult to break down and dilute.
  • Potassium hydroxide (KOH) 90% pure: potassium is one of the essential nutrients for plants, and potassium soap, in addition to helping control pests, will contribute to plant protection, nutrition and growth. It has to be 90% pure to guarantee effectiveness in the saponification reaction. 

  • Distilled water or rainwater: is used because it is free of impurities, minerals, and contaminants. Distilled water must be used to ensure that the chemical reactions take place as expected and to guarantee the purity, precision and consistency of the final product.


The Materials


To make this soap, you need to gather some materials. The ones we've marked in blue must be used exclusively for making soap because, for food safety reasons, the same materials cannot be used for cooking food and making soap (due to the chemical reactions between fats and potassium hydroxide, also known as caustic potash). 


None of the materials can be made of aluminum because of the reaction with potassium hydroxide!


This list of materials is in the order of use when making soap. 


  • 1 Digital kitchen scale (must be digital for greater accuracy in weighing ingredients)
  • 1 Stainless steel pan
  • 2 bowls for weighing the oils (we recommend weighing them separately in case of mistakes that require adjusting the quantities)
  • 2 tablespoons to help remove the coconut oil from the jar if it is solid
  • 1 Plastic or glass container for the water
  • 1 Plastic or glass container for the potassium hydroxide
  • 1 Pan base
  • 1 Stainless steel spoon to dissolve the hydroxide in the water
  • 1 Kitchen spatula for scraping the bowls with the oils
  • 1 Spatula for stirring the potassium hydroxide solution with the oils
  • 1 Hand blender (yes, it really must be exclusive for soap making!)
  • 1 Digital kitchen thermometer
  • 1 Small spoon (to help with pH tests)
  • 1 Pyrex
  • pH strips
  • 1 Large spoon (to help transfer the soap to a container)
  • 1 Container with lid to store the soap batter at the end
  • 1 Water container
  • 1 Water boiler, which will be very useful for dilution
  • 1 Funnel
  • 1 Container to store the liquid soap in at the end

These are the materials we use. Some of these materials are mandatory, others can be adapted according to what you have at home. Watch our video for a better understanding.


Safety Equipment


As always, safety equipment is more than mandatory, and here are all the necessary elements:

  • Safety goggles
  • Rubber gloves
  • Face mask. Surgical masks (also known as “Covid masks”) are not effective for dealing with chemical reactions, so more closed masks should be used.
  • A long-sleeved lab coat and closed shoes. All skin must be well protected.
See all the safety warnings on soap making in our post How To Make Soap.


How to Make Potassium Hydroxide Liquid Soap


First of all, you should know that the result is never liquid soap, but a thick batter that only becomes gel-like or even liquid once diluted, depending on the dilution ratio.

This soap is made using the Hot Process, meaning the soap will be cooked and will not need to cure once it has been made. Once again, if you don't understand these terms, read our post first: How To Make Soap.


Before we start the step-by-step instructions, we strongly recommend that you have a log book every time you make your own soap, so that you can write down (and later remember) all the important details of each production batch. Here is the notebook we use and recommend to everyone who makes soap at home, whether for personal use, to give away or to sell:


Log book that we use and recommend


So now we're going to share with you how we make this soap at home. Here are all the details:

  1. Start by weighing the empty stainless steel pan (ours weighs 374g). Knowing the weight of the pan will be crucial at the end of the whole process.
  2. Weigh the oils separately, each in its own bowl.
  3. Weigh the water.
  4. Put on all the safety equipment before starting to handle the potassium hydroxide.
  5. Weigh the potassium hydroxide.
  6. Add the oils to the pan (use the kitchen spatula to remove all the oil from the bowls, ensuring there is no waste or significant differences in the amount of oil).
  7. Turn the stove to low heat. (There's no need to heat it up too much, just until the coconut oil melts completely).
  8. While the fats are heating, pour the hydroxide into the water (never the other way around!) and stir with a stainless steel spoon.
  9. Once dissolved, add the water solution to the fats in the pan;

From here on, it's crucial to constantly monitor the temperature while stirring the solution!

    10. Measure the temperature and stir the solution with the spatula that is exclusively for soap making. The temperature of the solution should not exceed 70ºC. For those who have a Crockpot (a pan that maintains the temperature), this won't be a problem, but for those who don't, as in our case, it's necessary to keep putting the pan on and off the heat to make sure it doesn't go over 70ºC.
     11. After stirring the solution a little with the spatula, use the hand blender. Blend the solution for a few minutes, always monitoring the temperature, in a combination of stirring and a little heat from the stove.
     12. When the batter is too thick for the hand blender, use the spatula again. For us, the batter took 8 minutes to reach this point.
       13. When the batter has thickened and is beginning to steam a little, turn off the stove and continue cooking the batter using only the residual heat from the pan.
       14. Once the batter has reached the consistency of a paste where it resembles mashed potatoes, but much thicker, it is probably ready. For this we do the pH test.
      15. To do the pH test, put water in a Pyrex, add just a small amount of the soap paste (for a more reliable result, take it from the inside of the paste and not the outside) and stir well. Then, add a little boiling water as this helps to dissolve the soap paste.
        16. Place a pH strip in the water and check the result. The ideal pH for soap is between 8 and 10. Our paste has a pH of 8, which means that the paste is cooked and the soap is ready.
         17. Allow to cool completely before moving on to the next stage.


Storage and Dilution


To store and dilute, it requires a bit of mathematics, but nothing too complicated.

We got a total weight of paste of 429g. How do we know this? We know because we weighed the tare of the pot at the beginning (374g) and weighed the pot again after the soap paste had cooled (803g).  803-374 = 429g of paste.

For this post and video, we decided to divide the paste in half so that we could demonstrate how to store it and how to dilute it, both for use against garden pests and for home laundry. Let's break it down:

  1. Once the paste has cooled down, we removed about half of it from the pot using a spoon and a spatula.
  2. After this removal, the pan weighed 632g. So, 632 - 374 = 258g. This was the amount that remained in the pan to be diluted.
  3. 429 - 258 = 171g. This was the amount we stored for later dilution.


Storage

The 171g for further dilution has been stored in a plastic container with a lid. It can be stored in a cool place at room temperature.


Laundry Dilution


The 258g that remained in the pot were diluted to make laundry detergent. 

Now, how to dilute it?

The ideal ratio for this is 1:1.5

So 1 part soap to 1.5 parts water (258g x 1.5 = 387g water).


  1. Weigh out 387g of water.
  2. Use a kettle to quickly bring the water to a boil. The hot water will help break down and dissolve the thick paste. Some water is always lost to evaporation when boiling, but for this purpose, it doesn't make much difference.
  3. Add the boiling water to the pan, use the spatula to break up the paste a little, distributing it better throughout the water. Let it sit for a few minutes.
  4. Use the hand blender until it becomes a homogeneous liquid.
  5. Essential oils can be added at this stage. We prefer to use neutral detergent.
  6. Leave it to cool completely.
  7. After it has cooled, use a funnel to pour it into a container suitable for use in the laundry.
The use of this detergent is the same as for conventional detergents, meaning the recommended doses should be used according to the hardness of the water.


Dilution For Garden Pests


The 171g we saved for later were diluted to spray the pests in the vegetable garden and orchard. 

The dilution ratio for spraying varies depending on the type of soap, the pests to be combated and how heavily the plants are infested. In order to obtain a mild spraying liquid, for lightly infested plants, we will use a maximum of 10L of water for dilution. The 10L makes this easier as we have a 10L pot or two 5L water bottles can be used as an alternative. 

Many sprayers for home gardens are also 5L, so we advise you to make the dilutions according to these proportions, only adjusting the amount of soap according to the severity of the pest attack in the garden.

As this soap is difficult to break down, we recommend starting the dilution in the same way as we did for the laundry detergent, i.e. pour boiling water into the pan in a ratio of 1:1.5, break down and dissolve the soap, and then pour the solution into the pan or divide it between two bottles, filling them to the top with water. That's how you get a soapy spray!


How to Apply in the Garden and Orchard


Transfer the liquid to a sprayer.

The spray should only be used if pests are observed. It should not be used merely as a preventative method.

It should be applied directly to soft-bodied insects such as aphids, lice, mealybugs, caterpillars, whiteflies and moths. Remember not to spray directly on beneficial insects such as ladybugs and bees.

It can be applied once or twice a week, early in the morning or late in the day. Apply to the stems and leaves, not forgetting the back of the leaves where there is a higher concentration of pests.

Avoid applying on windy days and during the hottest hours of the day.


This post is already lengthy, and we hope it has been helpful to our readers! For a better understanding of this entire process, watch our video now, where we show each step in detail.

A big hug to our readers who follow us in the Azores and around the world!


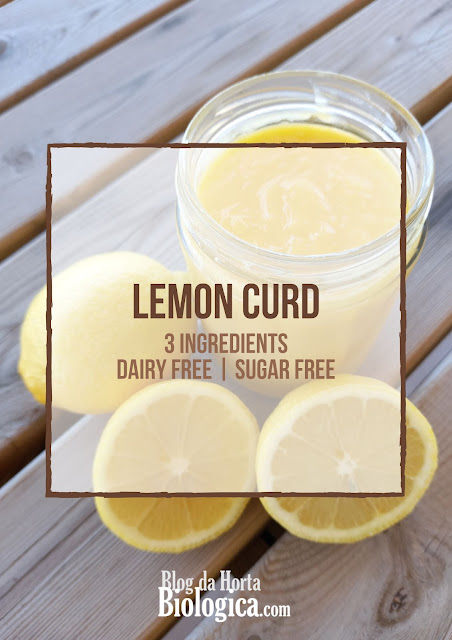
Lemon Curd | 3 Ingredients | Dairy Free | Sugar Free | Quick, Easy and Healthy Recipe

It's lemon harvest season again! Here on our blog, we've talked a lot about this wonderful and versatile fruit that always presents us with abundance. Sometimes there is so much lemon that we really have to use our imagination for using it all. From cooking to natural remedies, from detergents to cosmetics, among many other things, anything can be made with lemon. During the summer, we're really in the mood for a fresh, citrusy treat! That's why we're going to share our version of lemon curd, with 3 ingredients only, no sugar, and no butter. Healthy, super easy, and quick to make.  At the end of the post you can also watch our educational video where we show you how to make this recipe, step by step.

If you have much lemon and don't have time to prep recipes, you might like our post and video: 11 Tips To Preserve Lemon.


What is Lemon Curd Anyway?


"Lemon Curd" is a very old delicacy with British origins. It's a sweet, creamy paste originally made with lemon, eggs, sugar, and butter. It is commonly used for filling or topping cakes, but also for spreading on biscuits, toast, bread, or adding to other confectionery recipes. The word "curd" seems to be related to the thick, creamy texture that is obtained by cooking the ingredients. Nowadays, lemon curd is very popular all over the world and is yet another excellent way of using lemon!


Our Version of Lemon Curd


At home we like to come up with new stuff but we also like to make things simple. We wanted to make a lemon curd that was easy, quick, had few ingredients, and no sugar nor butter. So we chose just 3 vital ingredients for this recipe: lemon, eggs, and honey. The honey has to be multifloral and mild so that the cream is balanced and doesn't take on a strong flavor. We used honey from our own production. If you're curious to know what it's like to produce honey, check out our post and video: Harvesting and Extraction of Raw Honey. So let's jump into the recipe!


Ingredients


  • 4 eggs (we used a mixture of duck and chicken eggs)
  • 1/2 cup honey (remember it has to be multifloral and mild in flavor)
  • 1/2 cup lemon juice (the number of lemons needed varies)
  • Zest of 2 medium lemons

This recipe yields about 350g (12.34oz) of lemon curd. The quantity will always vary according to the size of the eggs and the final thickness of the curd.


How To Make It


  1. In a large bowl, add the eggs (yolk and white) and whisk until well blended.
  2. Add the zest, lemon juice and honey, and mix well.
  3. Add the mixture to a pan and cook over a low heat, stirring constantly, until it thickens. For us it took about 5 minutes to thicken (the time may vary depending on the power of the stove).
  4. As soon as the mixture has thickened enough to cover the spoon without spilling back into the pan, remove from the heat.
  5. Leave to cool slightly before pouring into a previously sterilized jar.
  6. Once cool, store in the fridge.
  7. The leftovers from this recipe (egg shells and lemon mesocarp) can be composted or reused. To find out how to use or preserve the mesocarp, see this post. To find out how to reuse eggshells, here's another tip: Natural Plant Fertilizer.


How To Use


You can use lemon curd on anything you can think of! 

Here are some tips:

  • Filling or topping cakes or cheesecake
  • Spread on cookies, toast, and biscuits
  • Add to other confectionery preparations such as pies, crepes, croissants, scones, tarts, desserts, etc
  • Add to natural yoghurt
  • Eat by the spoonful!


How To Store


It should be stored in the fridge for up to 2 weeks or until you start to notice a change in texture, color or smell. However, this is unlikely to happen... this lemon curd is so good that it shouldn't last long before it's gone! :) 


Have a look at our video where we show you everything in detail!


VIDEO - Lemon Curd | 3 Ingredients | Dairy Free | Sugar Free | Quick, Easy and Healthy Recipe


Cataplasm / Poultice: What Is It? How To Do It? How To Use It?

Cataplasm or Poultice is a paste of medicinal herbs that is applied to the skin to soothe burns, inflammation, irritated skin, or improve blood circulation. It is a natural remedy for external use, and as far back as ancient times the Romans and Greeks used it to treat various ailments.

We are at the peak of spring, a time when there is an abundance of plants, and it is just the right time to bring you another tip for more natural self-care. In this post we will show you how to make a cataplasm/poultice with fresh and dried plants, how to choose the plants and how to apply it to the skin. At the end of the post, also watch our educational video where we show everything, step by step.


What is a Cataplasm/Poultice?

A cataplasm or poultice is a paste made from medicinal herbs macerated and mixed with water and clay. The herbs used can be fresh or dried, and the use of clay, although optional, is well advised because clay, in addition to its skin healing properties, also helps form a consistent paste that becomes easier to apply.


How to Choose the Plants?

You can use a single plant or a mixture of several plants. The plants should be selected according to the problem to be treated. Here are some brief examples of plants that can be used individually or in a combination: 


For relieving muscle pain - Mint, Passion flower, Rosemary, Sage, and Nasturtium

For skin care - Calendula, Lavender, Chamomile, Parsley, and Rose

For menstrual pain relief - Anise and Sage

To bring down fever - Lime, Lemon grass and Laurel


These are just a few suggestions and we remind you that the plants and their active ingredients may have different effects on each person. If you have adverse reactions to any plant, its use should be discontinued. We also remind you that, unfortunately, natural remedies are not a substitute for conventional medicine when it is really needed.


Learn more about medicinal plants and how to prepare and use them in our book: "The 5C's of Aromatic and Medicinal Plants - Cultivate, Care, Collect, Conserve and Consume 30 Plants and Their Properties".


How To Do It?


Let's see how to make this medicinal paste with fresh herbs and with dried herbs:


With Fresh Herbs

  1. Choose the plants according to the problem to be treated. There are no right amount. An amount proportional to the size of the area to be treated should be chosen.
  2. In a bowl, macerate the plants. Now, when we say macerate, we mean to start by crushing the plant with a pestle so that it will then more easily release its active ingredients pnto the skin.
  3. Add just a little hot water to help soften the plants and continue macerating.
  4. Optionally, add a little clay* to help form a paste-like consistency. When it forms a homogeneous paste, the cataplasm/poultice is ready to apply.

* To make the cataplasm/poultice in this post and video, we used green clay. If you have very sensitive skin you can use white clay as an alternative.


If there is a good amount of plant left over, you can make bundles and dry them for later use, or you can use them to make smudge sticks.


With Dried Herbs

With dried herbs the process is similar. Only the amounts of water and clay may vary, since the plants are dry.

  1. Choose the plants according to the problem to be treated.
  2. In a bowl, macerate the plants.
  3. Add a little hot water to help soften the plants and continue macerating.
  4. Optionally, add a little clay to help form a paste consistency. When it forms a homogeneous paste, it is ready to apply.

The plant left overs can be placed in the compost pile.


How To Use It?

The cataplasm/poultice can be applied cold or hot, depending on the therapeutic purpose. If it is to relieve muscle pain, we advise applying hot. If it is to soothe skin burns, apply cold.

Apply the paste to the affected area and cover with a gauze, bandage, or cotton cloth to ensure contact with the skin. Some people just apply the paste to the skin without bandaging. However, we recommend using bandages, as they help keep the paste in place, especially if applied to an area where it is liable to run off. 

Leave it on for 10 minutes to 1 hour to enjoy all its emollient, anti-inflammatory, and soothing effects.


What About After Use?

After use, the paste should be placed in the compost pile, as it is all-natural. If the gauze or bandage is 100% natural, it can be placed in the compost pile as well. If a cotton cloth is used, it can be washed and reused.


We hope you enjoyed today's tips, and don't forget to check out our YouTube video to see, in a practical way, how to make these medicinal pastes. If you haven't subscribed to our channel yet, take the opportunity to do so if you don't want to miss a thing!


VIDEO - Cataplasm / Poultice: What Is It? How To Do It? How To Use It?


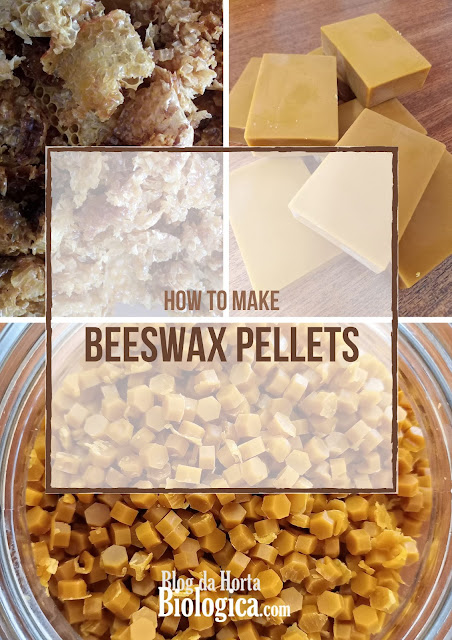
How To Make Beeswax Pellets at Home

We have already shown here on the blog how we collect beeswax from our beehives and how we clean the beeswax so that it can be used. We've also shown how to use beeswax in small amounts to make natural moisturizer. But did you know that beeswax can be a pain to use when it is no longer new? That's why it's good to store it in pellets, i.e. granulated form. Before we show you how to do it, you might also like to read our post How to Clean Beeswax: Melting, Filtering, and Storing. At the end of this post, you can also watch the step by step video on how to store beeswax pellets.


So let's take a look at this homemade method for making these pellets! 


Materials

  • Beeswax already clean (the amount is the one you have available or the one you want to melt)
  • 1 pan with water up to 2 inches high
  • 1 melting pot proper for melting beeswax (alternatively, a Pyrex can be used)
  • 1 silicone mold suitable for making pellets (we used trivets for this purpose)
  • 1 spatula or similar object for spreading the wax in the mold
  • 1 paper towel or sheet of parchment paper 
  • 1 airtight jar for storing the wax


Method

  1. Put the beeswax in the melting pot and let it melt it in the pan, in a water bath. The melting point of beeswax is at 70°C (158ºF).
  2. Pour the wax into the mold and spread it with the help of a spatula. The wax should be well distributed throughout the mold.
  3. Allow to cool completely.
  4. Once cold, remove the pellets from the mold using a sheet of paper underneath.
  5. With all the pellets on the sheet of paper, carefully pass them into an airtight jar.
  6. Store the jar in a cool, dry place.

Beeswax pellets make it easy when we want to use it in small amounts. You might like to watch our post and video Natural Moisturizing Cream | Step by Step Tutorial | Recipe For All Skin Types where we show you how to use beeswax to care for your facial skin.

Here is our video where we show you everything!


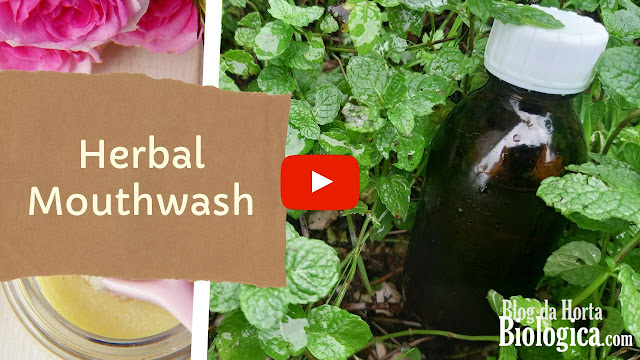
Herbal Mouthwash | Homemade Mouthwash with Organic Herbs

Almost anything can be made from plants! It's great to know that we can make our own products at home with simple, natural ingredients that respect our health and the environment...precisely because they come from it! So, today we are going to share with you our recipe for mouthwash with organic plants that are excellent in mouth and throat health care. Great news for those who don't want to spend too much money on the synthetic elixirs that are to be found in supermarkets! At the end of this post you can also watch our step-by-step video of this recipe.


For this mouthwash, we used plants that we harvested in our own garden. 

So let's see what the ingredients are and why to use them.


Ingredients

  • Spearmint (Mentha spicata): 1 small stem is enough.
  • Parsley (Petroselinum crispum): 1 small stem is enough as well.
  • Lemon tree leaf (Citrus limon): 1 leaf. It is important that the leaf is new and tender, and that it is clean and free of pests and diseases.
  • Rosemary (Rosmarinus officinalis): as needed.
  • Fennel seeds (Foeniculum vulgare): as needed.
  • Baking soda: 1/4 tsp.
  • Tea Tree essential oil: 4 drops.
  • Water: enough to make an infusion.


The plants used in this recipe can be fresh or dried. We used a mixture. The mint, parsley and lemon tree leaf were freshly picked. The rosemary and fennel seeds had been previously picked and were used dried.


We created this recipe for a 125ml / 4.22oz bottle. In case you are wondering what "a small stem" is, or what the "as needed" or "enough to make an infusion" actually mean, watch the video below so that you will be completely enlightened.


Why These Ingredients

Spearmint: is excellent for the digestive system and helps keep a fresh breath.

Parsley: also fights bad breath and soothes mouth irritation.

Lemon tree leaf: has anti-inflammatory properties and helps ease canker sores, gingivitis, and relieve throat inflammation.

Rosemary: is antibacterial and anti-inflammatory. It improves breath and relieves inflammation in the gums.

Fennel: also has excellent properties for the entire digestive system and is expectorant.

Baking soda (Sodium bicarbonate): very effective in oral hygiene. It relieves inflammation in the mouth and helps reduce stains on the teeth, keeping them cleaner and whiter.  

Tea Tree Essential Oil: the champion of the antibacterial essential oils, with great power to disinfect the mouth and helps keep the breath fresh for longer.


The plants present in this recipe can be changed as long as they have adequate properties for good oral hygiene.

Learn more about the properties and uses of these and many other plants in our book: "The 5 C's of Aromatic and Medicinal Plants: Cultivate, Care, Collect, Conserve and Consume -  30 Plants and Their Properties".


Required Materials

  • Kitchen tools for making an infusion.
  • 1 medium-sized glass jar for mixing various ingredients.
  • 1 spoon.
  • 1 funnel.
  • 1 small amber glass bottle with a wide lid. It is advisable to be an amber bottle to better preserve the liquid with essential oil.


Method

Now that we have all the ingredients and know why we should use them, let's see how to prepare the mouthwash:

  1. Start by preparing an infusion. The herbs should stay in the water for 5 minutes.
  2. Pour the equivalent of 125ml / 4.22oz into the medium-sized glass jar and let it cool completely. The remaining infusion can be used to prep more mouthwash bottles or for drinking. This is a very nice blend and makes a wonderful tea!
  3. After it has cooled, add 1/4 tsp of baking soda to the infusion and mix well.
  4. Add 4 drops of Tea Tree essential oil (aka Malaleuca) and mix well.
  5. Using a funnel, pour the mixture into the amber glass bottle.
  6. Ready to use!


How To Use and Conserve

The amount of mouthwash placed in the lid is sufficient for rinsing and gargling.

Ideally, you should use it once a day.

Shake the bottle well before each use.

It cannot be ingested due to the presence of the essential oil.

This mouthwash lasts up to 2 months. It does not require refrigeration, but can be stored in the fridge for cooler use.


We hope you enjoyed our recipe! Have a look at our video with all the details and if you haven't subscribed to our YouTube channel yet, take the opportunity to do so if you don't want to miss a thing!


VIDEO - Herbal Mouthwash | Homemade Mouthwash with Organic Herbs


How To Make Almond Milk | Natural | No Additives

In the season of dry fruits, we bring you some more tips for consumption...this time of almonds! In the last post we shared our recipe for Hazelnut Cream. In this post we will talk about homemade almond milk, made without any additives. Almond milk is flavorful, pleasant tasting and is also suitable for those who are lactose intolerant. For its benefits it is well worth making, if only to vary the usual consumer products. At the end of the post also watch our video with the step by step instructions to make this vegetable drink.


So let's see how to prepare almond milk!


Kitchen Tools

  • 1 Container for soaking the almonds
  • 1 Sieve or strainer to remove the water from the almonds
  • 1 Blender
  • 1 Nut Milk Bag
  • 1 Container for straining the milk
  • 1 Bottle or glass jar for storing the milk


Ingredients

  • Raw almonds: 200g (7.05oz)
  • Water as needed to soak the almonds
  • Water: 900ml (30.43oz) to mix with the almonds in the blender

These quantities will yield almost 1L (33.81oz) of almond milk.


Method

  1. Place the almonds in a container with water and let soak for 8-12 hours.
  2. Using a sieve or colander, drain out the water and wash the almonds.
  3. Place the almonds in a blender and add 900ml (30.43oz) water.
  4. Blend for 3 minutes.
  5. Using a nut milk bag, strain the liquid into a container.
  6. From this container, transfer to a bottle or glass jar. 

It is ready to drink!

Keep in the fridge and consume within 3 days.


What to Do With Almond Leftovers?

The almond leftovers in the nut milk bag can and should be reused in order to avoid wasting this precious food. Here are just a few tips for reuse and preservation:

  • Almond flour
  • Cake fillings
  • Candy toppings
  • Mix in yogurt
  • Almond cream
  • Almond butter


Our Special Tips

  • We use 900ml (30.43oz) water for 200g (7.05oz) almonds. If you want a thinner milk, you can add more water. If you want a thicker milk, add less water. 
  • To make almond flour, dehydrate in the oven for about 15 minutes at 60°C (140ºF). Once dehydrated, use a coffee bean grinder to grind more finely. Sieve and store the flour in an airtight jar.
  • For short-term use, the leftovers can be stored in the fridge.
  • If you don't know yet when you will use the leftovers, we recommend freezing them in individual portions (for example in ice cube trays) for later use.
  • To make vegetable butter, it is advisable to use it immediately after making the milk. Just put it in a food processor and continue to grind until it becomes creamy in texture. It is necessary to clean the walls of the bowl of the processor to ensure that the butter is well mixed. The time until it becomes creamy is variable, depending on the power of the machine.
  • If you are wondering what the difference between butter and cream is, here it goes: butter is made only with almonds, with no other additives. Cream can take all the additives you like to get a treat. Some examples of additives: vegetable milks, cocoa, coffee, yogurt, honey, cinnamon, etc... Visit our post Hazelnut Cream to have an example.


We hope you enjoy all our tips! 

Have a look at our video where we show you all the details and if you haven't subscribed to our YouTube channel yet, take the opportunity to do so if you don't want to miss a thing!


Hazelnut Cream | Homemade Nutella without Sugar and Chocolate | Simple and Healthy Recipe

Hazelnut is a dry fruit, delicious, nutritious, and healthy. The end of summer is hazelnuts season and, whether harvested or purchased, it's always good to have ideas for using them to delight everyone. That is why today we are going to share our recipe for hazelnut cream, which many people call "homemade nutella". There are many hazelnut cream recipes but, as always, we like to create and do things our way, so we will show you how we make our quick and healthy "nutella" with no sugar and no chocolate. At the end of the post also watch our video with the step by step of this recipe.


Let's get to the point!


Ingredients

  • 400g raw hazelnuts with skin. If you bought hazelnuts in the shell you might like to watch our post/video "How to Peel Hazelnuts Easily"
  • 5g raw cocoa powder
  • 180ml hazelnut milk
  • 15ml coconut oil (must be liquid)
  • 45ml raw honey

These quantities yield about 500g of hazelnut cream.


Method

  1. Put the hazelnuts in a food processor and grind until creamy. 
  2. To the cream add the cocoa, hazelnut milk, coconut oil, and honey.
  3. Mix everything together.
  4. Pour into a jar.
  5. It doesn't need to be kept in cold storage unless it will take a long time to be consumed...which is not very likely :) 


Our Special Tips

  • The honey used should be multi-flower and should taste just like honey! If you use honey with a strong aftertaste, the cream may taste unpalatable.
  • When grinding, you need a lot of patience! Only grind for a few seconds at a time and open the lid to clean the walls with a spatula and push the ground hazelnuts to the bottom. The total grinding time will depend on the machine power.
  • This recipe gives a thick cream, ideal for spreading. If you want the cream more liquid, we advise adding 1 TBSP of hazelnut milk at a time until you get the desired texture.
  • The amount of honey is sufficient for a lightly sweet cream, in order to avoid abusing. However, if you want a sweeter cream, we advise adding 1 tsp of honey at a time until you get the desired sweetness.


We hope you enjoy our recipe and our tips. Now take a look at the video where we show you all the details.


Happy eating!


VIDEO - Hazelnut Cream | Homemade Nutella without Sugar and Chocolate | Simple and Healthy Recipe