" Blog da Horta Biológica: About Plants
Mostrar mensagens com a etiqueta About Plants. Mostrar todas as mensagens

Herbal Mouthwash | Homemade Mouthwash with Organic Herbs

Almost anything can be made from plants! It's great to know that we can make our own products at home with simple, natural ingredients that respect our health and the environment...precisely because they come from it! So, today we are going to share with you our recipe for mouthwash with organic plants that are excellent in mouth and throat health care. Great news for those who don't want to spend too much money on the synthetic elixirs that are to be found in supermarkets! At the end of this post you can also watch our step-by-step video of this recipe.


For this mouthwash, we used plants that we harvested in our own garden. 

So let's see what the ingredients are and why to use them.


Ingredients

  • Spearmint (Mentha spicata): 1 small stem is enough.
  • Parsley (Petroselinum crispum): 1 small stem is enough as well.
  • Lemon tree leaf (Citrus limon): 1 leaf. It is important that the leaf is new and tender, and that it is clean and free of pests and diseases.
  • Rosemary (Rosmarinus officinalis): as needed.
  • Fennel seeds (Foeniculum vulgare): as needed.
  • Baking soda: 1/4 tsp.
  • Tea Tree essential oil: 4 drops.
  • Water: enough to make an infusion.


The plants used in this recipe can be fresh or dried. We used a mixture. The mint, parsley and lemon tree leaf were freshly picked. The rosemary and fennel seeds had been previously picked and were used dried.


We created this recipe for a 125ml / 4.22oz bottle. In case you are wondering what "a small stem" is, or what the "as needed" or "enough to make an infusion" actually mean, watch the video below so that you will be completely enlightened.


Why These Ingredients

Spearmint: is excellent for the digestive system and helps keep a fresh breath.

Parsley: also fights bad breath and soothes mouth irritation.

Lemon tree leaf: has anti-inflammatory properties and helps ease canker sores, gingivitis, and relieve throat inflammation.

Rosemary: is antibacterial and anti-inflammatory. It improves breath and relieves inflammation in the gums.

Fennel: also has excellent properties for the entire digestive system and is expectorant.

Baking soda (Sodium bicarbonate): very effective in oral hygiene. It relieves inflammation in the mouth and helps reduce stains on the teeth, keeping them cleaner and whiter.  

Tea Tree Essential Oil: the champion of the antibacterial essential oils, with great power to disinfect the mouth and helps keep the breath fresh for longer.


The plants present in this recipe can be changed as long as they have adequate properties for good oral hygiene.

Learn more about the properties and uses of these and many other plants in our book: "The 5 C's of Aromatic and Medicinal Plants: Cultivate, Care, Collect, Conserve and Consume -  30 Plants and Their Properties".


Required Materials

  • Kitchen tools for making an infusion.
  • 1 medium-sized glass jar for mixing various ingredients.
  • 1 spoon.
  • 1 funnel.
  • 1 small amber glass bottle with a wide lid. It is advisable to be an amber bottle to better preserve the liquid with essential oil.


Method

Now that we have all the ingredients and know why we should use them, let's see how to prepare the mouthwash:

  1. Start by preparing an infusion. The herbs should stay in the water for 5 minutes.
  2. Pour the equivalent of 125ml / 4.22oz into the medium-sized glass jar and let it cool completely. The remaining infusion can be used to prep more mouthwash bottles or for drinking. This is a very nice blend and makes a wonderful tea!
  3. After it has cooled, add 1/4 tsp of baking soda to the infusion and mix well.
  4. Add 4 drops of Tea Tree essential oil (aka Malaleuca) and mix well.
  5. Using a funnel, pour the mixture into the amber glass bottle.
  6. Ready to use!


How To Use and Conserve

The amount of mouthwash placed in the lid is sufficient for rinsing and gargling.

Ideally, you should use it once a day.

Shake the bottle well before each use.

It cannot be ingested due to the presence of the essential oil.

This mouthwash lasts up to 2 months. It does not require refrigeration, but can be stored in the fridge for cooler use.


We hope you enjoyed our recipe! Have a look at our video with all the details and if you haven't subscribed to our YouTube channel yet, take the opportunity to do so if you don't want to miss a thing!


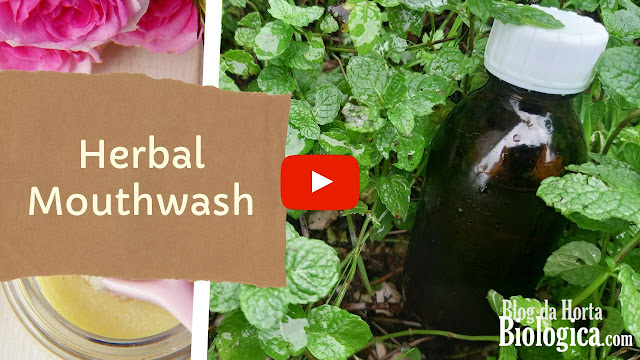
VIDEO - Herbal Mouthwash | Homemade Mouthwash with Organic Herbs


Olive Oil: The Soul of Food | The Properties and Production of Olive Oil, Olive Tree to Table!

The soul of food, green gold, and even gold for the poor! It has been called many things but certain is that olive oil is an indispensable element in food and its properties have been known and appreciated since ancient times. Olive oil was used not only in food, but also as an element of medicine and religious rites, as a beauty ingredient, as fuel for lighting and heating, and even as a lubricant for hardware and agricultural tools. As versatile as it gets!

Many years ago, in the early days of our blog, we launched the post Olive Harvest, where we showed, in a simple way, how the harvest is done. In this post we will talk about the benefits attributed to olive oil and show how it is produced. At the end of the post, watch our video where we show all the stages of olive oil production, olive tree to table.


Properties and Production of Olive Oil


What is Olive Oil and What Kind of Olive Oil to Eat?

Olive oil is the most characteristic element of the Mediterranean diet, which is considered one of the most complete and healthiest in the world. In such a way that, in 2013, the Mediterranean Diet was declared Intangible Cultural Heritage of Humanity by UNESCO.

Olive oil is obtained from the pressing of olives. It is widely used, not only in cooking but also in natural soap and cosmetics. Curious? Check out our video Olive Oil Soap: How to Make It and Its Benefits.

The healthiest olive oil is cold-pressed extra virgin olive oil. In this method, the olives are pressed right after they are picked and do not go through any kind of industrial processing, which makes this type of olive oil keep its nutrients and be the best in food and health.

Olive oil can be consumed immediately or can be left to mature. The taste and acidity of olive oil depends on several factors, such as air temperature, rainfall, humidity, how mature the olives are when they are harvested, and how long the oil has been maturing. When consumed immediately it can have a so-called "green taste". The best olive oil should have an acidity of less than 0,8%.


Benefits and Properties of Olive Oil 

Olive oil is a healthy fat and its daily consumption has several benefits for both physical and mental health. Although there is some discrepancy regarding the daily quantity to intake, overall the recommendation is between 1 to 3 dessert spoons per day.

Although olive oil can be used for cooking and seasoning, it is recommended that preference be given to consuming olive oil in its purest state, i.e. without heating, so that it retains maximum nutritional properties. However, despite this recommendation, it is important not to be extremist and to remember that olive oil is a very versatile oil that can and should be used in all ways that benefit our health. 

Olive oil can also be mixed with herbs in food to further enhance its properties, and can also be macerated with herbs and plants for other medicinal purposes. To learn how, check out our video How to Make a Maceration - DIY Herbal Infused Oil.


Now check out our infographic with the benefits and properties attributed to olive oil.


Olive Oil Properties de Blog da Horta Biológica


Olive oil is one of the anti-inflammatory foods. However, it is important to remember that the consumption of olive oil alone is not enough to obtain all its benefits. It is very important to eat a healthy and balanced diet. For detailed information about these foods, you may like to read our post Anti-inflammatory Foods For Disease Prevention and Strengthening the Immune System


Olive Oil Production, Olive Tree to Table!

Now that we've spoken about what olive oil is, what kind of olive oil to consume, and what properties it has, we are going to show all the production phases. Have you ever seen how the olives are harvested and how the oil is extracted in the press? Watch our video where we show you everything!


VIDEO - Olive Oil: The Soul of Food | The Properties and Production of Olive Oil, Olive Tree to Table!


How To Make Hydrosol with an Alembic

Hydrosols are delicate floral waters and, in addition to their aroma, they contain the medicinal properties of the plants. In our post How to Make Hydrosol | Floral Water we explained what hydrosols are and how to make them at home, in a simple way using not much more than a pot. In this post we will show you how to make hydrosol using an alembic, which allows for a more efficient distillation and a higher yield.

At the end of the post you can also watch our educational video where we show you how to do it step by step. If you already make hydrosols at home and want to know how to preserve them, please visit our post How To Preserve Hydrosols and Prolong Their Shelf Life.


The alembic we used for this post and video is a small 10L alembic that does not have a column for steam distillation, so the plants were placed inside the boiler in contact with the water to do a hydro-distillation.

The plant we chose was lavender (Lavandula stoechas), but you can use other plants you are interested in. 


The Alembic


For those who want to start using the alembic, here are the names of its components:


How To Make It


All flowers, stems and leaves can be used. However, because most of the aromatic molecules are found in the flowers of this plant, and because our alembic is small, we have used only the flowers.

The stems and leaves can be used, for example, to make natural incense.


Here’s how we make our lavender hydrosol.

  1. We place the flowers inside the boiler and take note of the weight of the flowers.
  2. Then we put distilled water in, using a ratio of 3 parts of water to 1 part of plant. With the plant and water inside, the boiler is ready to go on the stove.
  3. We cover and join the helmet and condenser tubes. The joints of these tubes can also be sealed with Teflon tape.
  4. We turn on the stove and wait for the water to start boiling.


The Distillation Process


This is what happens during the distillation process.

  1. As the water boils, steam will rise, pass through the condenser tube (also known as the gooseneck) and descend to the condenser coil. The condenser is filled with cold water. During the whole process, the water in the condenser is kept cold by circulation through a pump, which can be an aquarium pump. This pump must be placed in a tank where the water can be kept cold. This can be a bucket, bowl or sink. To keep the water cold throughout the process, cold accumulators or ice cubes can be used.
  2. The water comes out from the top of the condenser, goes to the pump tank and is pumped back to the condenser. It is advisable that this pipe has a flow regulating valve, so that the water slowly flows back in from the bottom of the condenser.
  3. The cold water will condense the vapors that are inside the coil, and the hydrosol will start coming out.
  4. The floral water must come out into a jar, preferably made of glass. This jar must have a funnel and a coffee filter to prevent plant residues from getting into the hydrosol.
  5. After about 1h30 we turn off the stove and wait until no more hydrosol comes out.
  6. Then we wait for the alembic to cool down, remove the plant and rinse the alembic  with alcohol. The alembic must be kept very clean and dry until the next use.


When doing all this process it is important to record some data such as the weight of the plant and the final yield of the hydrosol. In this process we used 337g of plant and obtained about 700ml of hydrosol.

To learn how to store the hydrosol correctly so that it lasts for a long period of time, read our post How to Store Hydrosols and Prolong Their Shelf Life.


For a better understanding, here’s our video where we show this process step by step. If you like our videos and haven't subscribed to our YouTube channel yet, take the opportunity to do so if you don't want to miss a thing!


VIDEO: How To Make Hydrosol with an Alembic


Differences Between Fennel and Anise

In previous posts we talked about Fennel and Anise. Many people confuse these plants or think they are the same thing because they are similar. However, these are different plants and it is about these differences that we are going to talk about in this post. At the end of the post you can also watch the video where we show comprehensive images with the differences between both plants.


Similarities


These plants are confused because they have some similarities, such as:


  • Both have a sweet aroma.
  • Both are native to the Mediterranean basin.
  • Both have similar medicinal properties and are especially indicated to care for all parts of the digestive system.
  • Both are from the same family (Apiaceae), which means they have some morphological similarities as well.


Differences


Although they have similarities, these plants are easily distinguishable. Watch our infographic to know all the characteristics that differentiate them. 

Fennel vs Anise Chart de Blog da Horta Biológica


To learn in detail about these differences, take a look at our video now. If you like our content and haven't subscribed to our Youtube channel yet, take the opportunity to do so, if you don't want to miss a thing!


VIDEO - Differences Between Fennel and Anise


Fennel (Foeniculum vulgare) - From Cultivation To Harvesting

Fennel (Foeniculum vulgare) has been highly appreciated since ancient times in several countries of Europe and the Middle East. It is a very aromatic plant and full of health benefits. It is antibacterial, antispasmodic and is used mainly to relieve digestive system problems such as flatulence, indigestion, inflammation, sickness, diarrhea, and bad breath. In Portugal it is very easy to find this plant in vacant fields and it can also be grown in the garden or in pots. 


In this post we are going to speak precisely about the cultivation of this plant. Watch our infographic to know how to grow fennel and, at the end of the post, our video where we show you how to harvest fennel in the spring and fall/autumn.


Fennel de Blog da Horta Biológica


VIDEO - Fennel (Foeniculum vulgare) | How To Harvest Leaves and Seeds | Harvesting in the Spring and Autumn/Fall


Anti-inflammatory Foods for Disease Prevention and Strengthening the Immune System

There is a wide variety of foods with anti-inflammatory properties that can be included in the daily diet, regardless of the type of diet each person follows. It is very important to eat these foods because they strengthen the immune system and help to prevent and fight inflammation. When inflammations become recurrent or even chronic, they can trigger serious health problems such as rheumatoid arthritis, diabetes, obesity, some types of cancer, cardiovascular problems and neurological diseases such as Alzheimer's.

Although these foods are no substitute for medical care, they are an excellent way to provide well-being and care for ourselves and our loved ones. In addition, many of these foods can be easily grown in the garden or in pots.


Because we have already had some cases of serious inflammation in our family, we have carried out our research so that we can acquire more knowledge about this very important subject and be able to share with our readers, family and friends everything that we have discovered that could help everyone to have a better life, with more quality.

It is important to mention that much of the information we collected was taken from Dr. Patrick Holford's precious book "The Alzheimer's Prevention Plan" which places great emphasis on the importance of inflammation prevention for good mental and physical health.


What is Inflammation?


An inflammation is a reaction of the body to an infection or injury of tissues or organs, caused by external factors. The immune system itself develops inflammation as a way of responding to and fighting off offending agents. Although it is a natural reaction of the body, when inflammation happens frequently or over a long period of time, it can lead to several types of serious diseases, as mentioned before.


How do Anti-inflammatory Foods Act in the Body?


Foods that contain anti-inflammatory properties minimize the imbalances that occur in the body, caused by inflammation. The Mediterranean diet is advised in the fight against inflammation, because it includes many of these foods. 

In addition to anti-inflammatory foods, we will also talk about pro-inflammatory foods that boost the appearance and increase of inflammation. 


We will then start by talking about foods that should be avoided or at least moderated.


Pro-inflammatory Foods


Increasing the amount of anti-inflammatory foods in the diet is not enough if you do not reduce the amount of pro-inflammatory foods, i.e. foods that contribute to increased inflammation. We are talking about industrialized products and processed foods which, due to their high number of dyes, synthetic preservatives and other chemical substances added to them, should be reduced or avoided whenever possible.


  • Processed meats with a lot of fat, such as sausage, hamburger and bacon
  • Red meat when consumed in excess
  • Frozen food, pizza, lasagna, breaded meats and all kinds of fast food
  • Canned salted food
  • Refined food oils
  • Sugary beverages
  • Alcoholic drinks when consumed in excess
  • Sweets and fried foods
  • Foods loaded with sugar, such as pastry products and breakfast cereals


Are Lactose and Gluten Pro-Inflammatory?


Foods containing lactose and gluten are associated with allergic reactions and inflammatory processes in some people. However, these foods also have their benefits and should not be totally avoided by those who do not have sensitivity, so moderation in their consumption is the way to take. Here are some examples:


  • Milk of animal origin and some of its derivatives, such as cheese, butter and ricotta
  • Refined carbohydrates, such as pasta, white rice, wheat, cookies and store-bought bread 


Although these foods are inadvisable and it is not always possible to avoid them, it is important to remember that each person is unique in their individual needs and should not cut foods from their diet without first talking to a doctor or nutritionist, especially those with health conditions.


Anti-inflammatory Foods


We are now going to approach, in a simple and direct way, a great part of the foods that present anti-inflammatory properties. Get to know them in our infographic.


Anti-inflammatory foods de Blog da Horta Biológica


Always Important to Remember! 


The fact that these foods are considered anti-inflammatory does not mean that we can abuse them. Even healthy foods and so-called "superfoods" have toxic potential if taken in excess. We stress again that the uniqueness of each person requires special care. It cannot be taken for granted that what works well for some will also work well for others. Scientific research shows that some foods considered anti-inflammatory may also have pro-inflammatory responses (such as eggs), so their consumption may have different effects on each individual. Those who have doubts as to what they can or cannot intake and as to the amounts they can include in each meal, should consult a doctor or nutritionist, especially those who suffer from some health condition.


Habits That Help Improve Immune System Response


Besides an anti-inflammatory diet, there are many other healthy habits that can be adopted for a more balanced and happy life and that help to increase well-being and keep the immune system strong. Some of these suggestions were also taken from the Dr. Patrick Holford's book we mentioned earlier.


  • Outdoor exercises, especially yoga and tai chi
  • Meditation
  • Learning new things
  • Having a list of things to do (but without exaggeration!)
  • Sleep well (create a routine at the end of the day that helps you sleep better)
  • Sunbathing in moderation
  • Listening to music
  • Dancing
  • Finding a healthy hobby with purpose


We hope that all the information in this post will be useful to help each and every person to have a better quality of life and to make better choices for a healthier daily routine.


Until the next post, take good care!


Xo xo


How To Make Hydrosol | Floral Water

Making hydrosol is an excellent way to make the most of the medicinal properties of plants, both in physical and emotional health. The well-being that this activity provides is undeniable. From the contact with nature during the harvesting of the plants, to the wonderful aroma it leaves in the air during distillation, and its various forms of use, making hydrosol is a beautiful way to take care of ourselves and those that are dear to us. 


For this post we have made rosemary hydrosol. We will explain what hydrosols are, how they are made, and how they are preserved. At the end of the post you can also watch our video where we show you how to do it, step-by-step.


What are Hydrosols?


Hydrosols, also known as floral waters, distillates or hydrolates are obtained by steam distillation. They are, in fact, a by-product of the distillation process of essential oils. They are very aromatic and refreshing and have medicinal and therapeutic properties. They are used in personal care, especially for people with sensitive skin. So let's find out what it takes to make hydrosols.


Required Materials


  • 1 Stainless steel pan with lid
  • 2 heat resistant glass containers (both must be of a suitable size to fit inside the pan)
  • Ice cubes and freezer bags
  • Funnel
  • Amber glass bottle (previously sterilized)
  • Label for the bottle


Required Ingredients


  • Distilled water
  • Fresh or dried plants (we used freshly harvested rosemary)


It is not necessary to have an exact amount of plant and water. Depending on the amount of plant available, you choose the size of the pan and the amount of water. 


How To Do It


The method we will show you is homemade and very simple.

  1. In the middle of the pot, place one of the glass containers facing down.
  2. Spread the plants around the container (a sufficient amount of plants should be placed to cover the sides of the container).
  3. Add distilled water (enough distilled water must be added to cover the plants and sides of the container).
  4. Place the other glass recipient on top of the container facing upwards. This is the container that will collect the floral water.
  5. Place the lid (inverted) over the pan.
  6. Place a bag of ice cubes on top of the lid. It is important to have some ice cube bags prepared in advance, as during the distillation process the ice will melt and it will be necessary to change the bags.
  7. Leave on a low heat for about 45 minutes.
  8. The heat below and the ice above cause condensation inside the pan and the hydrosol, which also contains small particles of essential oils, will be collected inside the glass recipient.
  9. After 45 minutes, turn off the heat and let it cool.
  10. With the help of a funnel, pour the hydrosol into an amber glass bottle.
  11. Place a label with the name of the hydrosol and the date it was made.


Amount of Hydrosol


The final amount of hydrosol will always vary according to several factors, such as:

  • The amount of plant available.
  • Whether the plant used is fresh or dry.
  • If the plant is fresh, the amount of water in its composition depends on factors such as rain, air humidity, and soil. Even though plants may be removed from the same bush time after time, the end result may not always be the same.


To know the approximate yield, one can weigh the initial amount of plant and the final amount of hydrosol. However, as we said before, the results may always vary.


If, at the end of the 45 minutes, there is little hydrosol, you can continue to add distilled water inside the pan and continue the process for a few more hours. It is important to always be around to change the bags with ice cubes and check whether it is necessary to add more water inside the pan.


How to Store


The best way to preserve hydrosols and prolong their shelf life is in glass bottles, in a dark and cool place. They can be stored in the refrigerator, but never in the freezer. In these conditions they can last up to 2 years. For more information on how to preserve hydrosols, visit our post How To Preserve Hydrosols and Prolong Their Shelf Life.


Ways of Use


As we mentioned, hydrosols contain the properties of plants and, because they are so soft, they are excellent for those with sensitive skin. They can be used in various ways:

  • Natural soap
  • Facial toner
  • Hair care
  • Formulation of facial and body moisturizers and lotions when added in the aqueous phase of emulsions
  • Aromatherapy


Making hydrosols is very simple and is a way of leading a more natural life. Try it and you will look no further! :)


If you liked this post you may also like our post How To Make Hydrosol with an Alembic.


Check out our video where we show you how to do it in a practical way. If you haven't subscribed to our Youtube channel yet, take the opportunity to do so to receive, first hand, our content about the incredible world of plants!


VIDEO - How To Make Hydrosol | Floral Water


Rosemary: Medicinal Properties And Ways Of Use

Rosemary (Rosmarinus officinalis) is a perennial shrub that belongs to Lamiaceae family, the same as mint, and is native to Mediterranean countries. In Portugal it is easily found a little bit all over the country.


A Little Bit Of History


Rosemary and its benefits have been known for millennia. For the Egyptians, rosemary symbolized immortality and was used for embalming. Students in ancient Greece put rosemary in their hair to help improve memory at the time of exams. The Romans designated it as "rosmarinus", which in Latin means "dew of the sea" and used it to perfume public spaces. In the 13th century, during Black Death, rosemary was used to disinfect and purify air in hospitals. Rosemary was also the main ingredient in the famous "Queen of Hungary's Water", which is estimated to be dated to end of the 14th century. Although it was a perfume, it was also considered a medicinal remedy. Rosemary has reached our days being used for culinary, religious, cosmetic, and medicinal purposes.


In its composition, rosemary contains rosmaniric acid, flavonoids, camphor, tannins, volatile oils, among others. See, in our infographic, the medicinal properties attributed to rosemary.


Rosemary Infographic de Blog da Horta Biológica


How To Use Rosemary


Rosemary can be used fresh, dry, powdered, tea, and oil. All of these with properties equally important for physical and emotional health. 


  • Culinary


In cooking, rosemary is used to decorate and, most of all, to flavour meat and fish, potatoes, bread, soup, sauces, and butters.


  • Infusion


10g of leaves for 1L of boiling water.


Ways To Use The Infusion:


  • Take rosemary tea throughout the day to calm digestive problems
  • Rinse/gargle to disinfect mouth and throat 
  • Massage the scalp to stimulate blood circulation and hair growth 

It can also been used by steam inhalation to disinfect airways. To do this, pour a handful of dry leaves into boiling water, use a towel to cover your head, and inhale the steam.


  • Essential Oil


The essential oil is for external use only and must always be diluted before application.


Air Diffusion - Use an air diffuser to purify the air and help in the recovery process. 5 drops in a diffuser are enough in a bedroom. For a living room 8-10 drops can be used.

Inhalation - For cough, bronchitis, and other breathing problems. For 1L of boiling water add 5 drops of essential oil. Use a towel to cover your head and inhale the steam. 

Massage - Energizing massage to recover from physical and mental tiredness. Scalp massage to stimulate blood circulation and prevent hair loss. 

The essential oil must be diluted in a carrier oil suitable for the skin type  (ex: jojoba oil for oily skin / coconut oil for dry skin). 3-5 drops of essential oil to 15ml of carrier oil. 

Massages can be done with carrier oil, but also with massage bars and candles. 

Bath - Add to the bath to recover energy and vitality, and increase concentration. Maximum 8-10 drops of essential oil.

Cosmetics and hygiene - Rosemary is excellent for skin and hair, especially the oily type. It can be used to formulate moisturizer, balm, soap, shampoo, deo, and perfume. 

It can also be added to clay masks. 6 drops of essential oil for 30ml of carrier oil, mixing the clay suitable for the skin type to create a thick paste.


Special Care


Rosemary must be avoided during pregnancy and breastfeeding. It must also not be used by people suffering from hypertension and other heart problems. People with very sensitive skin should avoid using essential oils.


Products We Recommend For Their High Quality


Nettle Slurry: Benefits and How to Make It

Nettle is an excellent plant, not just for gastronomy and health but also for taking care of other plants on farming and gardening. In this post we talk about the benefits of nettle slurry and, at the end, you find our video about how to make nettle slurry step-by-step.


What Is Nettle Slurry?


Nettle slurry is a concentrated liquid obtained by maceration of this plant. This is a biological process that takes several days and results from the decomposition of organic waste. Nettle slurry benefits both plants and soil, and can be used for both spraying and watering.


Benefits


Nettle slurry is a great ally in organic farming because it is a totally natural product and is very versatile in its use. It is an excellent fertilizer, an effective stimulant for plant growth, it has a protective action against diseases, a repellent effect against pests, and is also a compost activator.


Fertilization


Nettle, among other properties, has a high content of nitrogen, sulfur, iron, phosphorus, silicon, magnesium, potassium, vitamins, and micronutrients. Sometimes, land has these in limited quantities. Because nettle is so rich in properties, it can be used as a liquid fertilizer, enriching the soil and developing plant growth.


Growth


Nettle benefits soil and plant growth in several ways. 

  • It absorbs nitrogen in the soil, supplying it to plants. Nitrogen is the element that plants need the most, being essential for their growth.
  • It facilitates photosynthesis due to the carbon dioxide produced by its bacteria. 
  • The immersion of the seeds in nettle slurry before cultivation, stimulates the growth and resilience of the plants. 


Protection Against Diseases


By providing the soil with the missing nutrients, it stimulates the defense mechanisms of the plants, strengthening them and making them more resistant to diseases, especially those caused by fungi, such as mildew, powdery mildew, and mold.


Pest Repellent


In addition to protecting against diseases, nettle has bactericidal and antiseptic properties. In nettle naturally occurs formic acid, which is produced by the plant for the purpose of self-defense. Due to its abilities as a natural insecticide it is very effective against aphids, mites, the red spider, the white fly, and other unwanted creatures in the garden.

Composting


Because it has a large amount of nitrogen, nettle favours the activity of microorganisms and is an excellent activator of the composting process. The bacteria present in the liquid stimulate fermentation and accelerate the decomposition of organic waste.


How To Make Nettle Slurry?


Required Material


  • 2 Plastic or wood containers with 15L capacity (do not use metal)*
  • Rubber gloves
  • Scissors 
  • 1 Kg of fresh nettles, preferably without flower*
  • 10L of rain or distilled water*
  • Filtering cloth
  • Funnel
  • 2 recipients for storage (water bottles will do)

Warnings


  • Use long-sleeved shirts and thick clothing to avoid skin irritation. 
  • The preparation should be done outdoors due to the smell it will cause in the following days. 

*Do not use metal because nettles are rich in acids such as acetic, butyric, and formic. The reaction between acids and metal can release toxic substances.

*Preferably without flower because although nettles can be harvested practically all year round, before flowering they are less fibrous and decompose more easily. Blossomed nettles will also do the job but they will take loner to decompose and will also result in more fibrous tissues, with less use of the plants. 

*Rain or distilled water because the water that is used to make nettle slurry must not contain chlorine. This is very important, as chlorine kills most of the bacteria responsible for fermentation.


Preparation Method


  1. Cut the nettles and place them in the container, add the water, and stir to mix well.
  2. Cover the container and store it in a sheltered place without direct sunlight. The temperature must be between 18ºC and 25ºC.
  3. Stir every day to release the accumulated gases and to better involve the plants in the water. Cover the container again after stirring. The fermentation process takes time and will depend on the air temperature. Heat accelerates the process, cold delays. Generally, after a week, the fermentation process should already be underway. We know that it is fermenting if there's foam on top of the water.
  4. Keep stirring every day until the foam disappears. This process releases a very strong smell, so it must be done outdoors. When foam disappears, the fermentation process ends and the slurry is ready to be filtered. It may take up to two weeks to complete. This slurry that we made for this post was made during the month of March, in which we had very hot days and very cold days. Our nettle slurry took 18 days to be ready to use.
  5. Use a cloth to filter the slurry. It might be necessary to make more than one filtration. The liquid should be as clean and free of residues as possible, so that it does not go bad and so it has a longer shelf life.
  6. Place the remains of the plant in the compost pile.

Storage


Store the liquid immediately by pouring it, with the help of a funnel, into a container with a lid. Store the container in a cool, dark place. Under these conditions, nettle slurry may last more than a year. It is also very important to label the container in order to remember the date the slurry was made.


How To Use Nettle Slurry?


Nettle slurry is highly concentrated, so it must be diluted. See the percentage dilution in table below.


Many vegetables and other plants appreciate nettle slurry. Examples of this are cabbages, tomatoes cucurbitaceae, fruit trees, roses, and other flowers. 

Onions and legumes will be less likely to enjoy the application of nettle slurry. However, when in doubt, it is always a good idea to experiment in a small part of the garden and see how the plants react to watering and spraying with nettle slurry.

All of this process takes a lot of time and work but it is worth it! There's nothing like knowing that we are taking care of ourselves, our food, and our land in a totally natural way.