" Blog da Horta Biológica: Harvest
Mostrar mensagens com a etiqueta Harvest. Mostrar todas as mensagens

11 Tips To Preserve Lemon For a Long Time | Natural Methods | No Additives

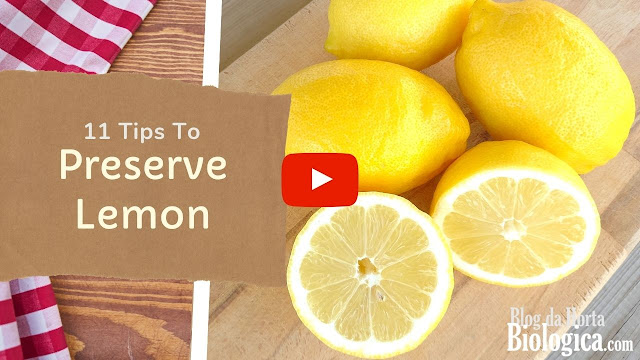
Today we are going to talk about lemon! We are going to share how we preserve all parts of lemon at home, without waste and without additives. Those who have a lemon tree and don't know what to do with so many lemons, or those who are gifted with several kilos of lemons by someone in the family who also doesn't know what to do with them, will surely benefit a lot from this post. At the end of the post we also have our educational video where we show the step-by-step process for each preservation method.


When nature gifts us with abundance, creativity must be used! Our lemon tree is always generous and we don't like to waste our organic lemons, so we preserve them in every way we can think of. One must also remember that lemon is one of the anti-inflammatory foods and deserves much care when preserving it.


There are various methods of preserving lemon that include additives such as salt, sugar, seasonings, etc. However, because we like preservation methods, without additives, that preserve the taste of vegetables, we will show you how we preserve all parts of lemon in the most natural way possible. 

IMPORTANT: We can't emphasize enough that the lemon peel should only be consumed if the lemon is organic. For store-bought lemons or lemons from conventional farming, it is highly inadvisable to consume the peel!


#1 Preserving Whole Fresh Lemons

In this method, we put the whole lemons in freezer bags, which we remove the air from with a pump. You can find these bags here. By removing the air from the lemons we are inhibiting oxidation, thus prolonging their shelf life. The lemons can then be kept fresh in the refrigerator and used au naturel for up to 6 months. It is important to put a label with a date to remind of the validity.

To use, simply remove the amount of lemons needed for each recipe and reseal the bag, removing the air.


#2 Preserving the Peel (in slices)

Using a fruit peeler, we remove the peel all around the lemon. This is done carefully, removing only the yellow part in very thin slices, leaving the white part intact. The peels can be placed in boxes or freezer bags and stored in the freezer. It's okay to store them all together because, even frozen, they separate easily.

The peels can then be used to make lemon tea, flavored waters, decorate candies, and make macerations.


#3 Preserving the Peel (in zest)

The zest can be obtained in two ways. The traditional way is to use a zester. The other way is to remove the peels with a fruit peeler and grind the slices in a food processor. This second way is faster and more effective, also leaving the white part of the lemon intact. We flatten the zest in a freezer bag and then remove the air from it to take up less space in the freezer. The bag should be flattened so that it is easy to break/remove only the amount needed at a time.

The zest can then be used in various types of cooking, candies, ice cream, and even natural soap!


#4 Preserving the Juice

To make the juice, simply use a juicer. We put the juice into ice cube molds and put them in the freezer. After freezing, we pass the cubes into freezer bags, remove the air, and put them back in the freezer.

The cubed juice can then be used to make lemonade, flavored waters, cooking, and even other curious things like natural hair removal wax and natural bee food!


#5 Preserving the Pulp

After squeezing the juice, there is always pulp left. The pulp can also be frozen in molds, small or large, depending on what you are going to use it for. 

Both the clean pulp and that pulp that still contains seeds can be preserved for later use in various ways, such as making lemon soap, filling cakes and doing other creative cooking.


#6 Preserving the Mesocarp - white part (in gel)

Many people throw away the mesocarp, because they think it has no use...but it does! Mesocarp is rich in iron, magnesium, calcium, and zinc. Its gel texture contains soluble fibers that decrease appetite and contribute to satiety, thus helping with weight loss. Contrary to popular belief, its flavor is actually quite pleasant and much less acidic than the peel.

To preserve the mesocarp in gel, we cut the white parts into small pieces and put them in the food processor until they become zest. Then we put the zest into a strainer bag and squeeze. This task is time consuming and requires hand strength. We place the gel in a glass jar and store in the refrigerator. It can be stored up to two weeks.

Mesocarp gel can be used as a natural thickener for jams and other sweets and can also be eaten by the spoonful...but only a little bit at a time!


#7 Preserving the Mesocarp - white part (in zest)

The mesocarp can also be stored in zest to be processed later. It can be frozen in individual portions, in larger molds or in flattened freezer bags, so that it's easy to break and remove just the necessary doses for each use.

The shredded mesocarp can then be used to make gel, fill cakes, and even mix into yogurt.


#8 Preserving All Parts (peel + white part + pulp)

To preserve all parts: peel (epicarp), white part (mesocarp) and pulp (endocarp), we cut the lemons into small pieces and put them in the food processor until they are all well shredded with a kind of paste-like consistency. We then put it in individual portions in large molds, freeze it, transfer it to freezer bags, and keep in the freezer again.

Preserving all parts of lemon is particularly useful for making natural lemon soap or lemon dishwashing detergent. This mixture can also be squeezed into a strainer bag to use in any recipe that requires lemon pulp or juice.


#9 Preserving in Slices (frozen)

Another way to preserve lemon is to slice it, removing the seeds. The seeds can then be used to germinate and grow new lemon trees. We store the slices in boxes and keep them in the freezer. We do not recommend storing in freezer bags as the slices will stick together too tightly and it may be difficult to separate without breaking them.

The slices can then be used to make flavored waters and decorate drinks.


#10 Preserving in Slices (dehydrated)

For this method of preservation, we cut very thin the slices. We remove the seeds, place the slices on the oven rack, and leave them in the oven for about 5 hours at 80°C. The dehydration time will always depend on the efficiency of the oven. Once dehydrated, we store the slices in an airtight jar so that they remain well dried and no moisture can enter.

The dehydrated lemon slices are so beautiful that they can be used to decorate candies and other baked goods, as well as be consumed directly.


#11 Preservation in Powder

After dehydration, the slices can also be reduced to powder. We grind the slices in a coffee grinder and then use a sieve to make the powder very fine. This task should be repeated until everything is processed. We store the powder in an airtight jar. When kept well dried the powder can be stored for more than a year.

Lemon powder is quite versatile and can then be used to sprinkle various types of cooking and desserts. 


And this is how we preserve lemon at home! We are sure you will find our tips very useful! 


Take a look at our video where we show the step-by-step instructions for each of these preservation methods. If you haven't subscribed to our Youtube channel yet, take the opportunity to do so if you don't want to miss a thing!


VIDEO - 11 Tips To Preserve Lemon For a Long Time | Natural Methods | No Additives


How to Make Fruit Liqueur | How to Make Jam with the Leftover Fruit of the Liqueur

There are many ways to preserve fruit, but none will be as noble as liqueur! In addition to keeping for many years, it is an excellent gift to give to family and friends, as well as for personal consumption, and can be enjoyed after a meal.

The liqueur we made for this post was made with organic black figs from our trees, but the same method can be followed for several other fruits. In addition to the liqueur, we also show you how to make jam with the fruit leftovers. Nothing is lost...

At the end of this post, check out our educational video where we show you how to make the liqueur and the jam step by step.


So let's see first how to make the liqueur.


Ingredients


  • 1Kg Black figs
  • 1L Cachaça (it does not have to be a specific brand, but it must be of good quality)
  • 1L Water
  • 1Kg Brown Sugar
  • 2 or 3 Cinnamon sticks (optional)


Materials


  • 1 Large glass jar with lid
  • 1 Sieve
  • 2 Large containers
  • 1 Tablespoon or potato masher
  • 1 Wooden spoon
  • 1 Large pan
  • 1 Funnel
  • Pre-sterilized glass bottles to store the liqueur


How To Do It


1st Phase: Fruit Maceration


  1. Harvest the figs. If it is not possible to make the liqueur on the same day, the figs must be refrigerated.
  2. Cut the figs into 4 pieces and place them inside the glass jar.
  3. Cover the figs with Cachaça.
  4. Cap and shake the jar well.
  5. The jar should be kept in a cool, dry place for 30 days (maceration time).
  6. During the 30 days the jar must be shaken at least once a day. The ideal is 3 times a day.


2nd Phase: The Liqueur Preparation


  1. After 30 days, use a sieve to strain the liquid into a large container.
  2. With a spoon or potato masher, squeeze the fruit to remove as much liquid as possible. Reserve the fruit.
  3. In a pan, add 1kg of brown sugar and 1L of water. Mix and boil for 10 minutes. Here you are preparing a syrup that will add sweetness to the liqueur.
  4. Once ready, add the fig liquid to the syrup.
  5. Mix well.
  6. Optionally, cinnamon sticks can be added to the mixture and stirred for a few minutes, removing the sticks before pouring the liqueur into the bottles.
  7. Use a funnel to store the liqueur in glass bottles.


Now, let's see how to make jam with the fruit leftovers.


Ingredients


  • The figs used to make the liqueur
  • 250g Brown sugar


Materials


  • 1 Pan
  • 1 Wooden spoon
  • 1 Hand blender
  • 1 Tablespoon
  • Pre-sterilized glass jars to store the jam


How To Do It


  1. Place the fig leftovers in a pan.
  2. Add 250g of brown sugar.
  3. Mix well.
  4. Let simmer for 20 minutes.
  5. After 20 minutes, mix with the hand blender.
  6. Stir a little.
  7. With a spoon, immediately transfer to the glass jars and cover.
  8. Keep the jars upside down to create vacuum (you know it's under vacuum when you hear the lid clicking and it gets sucked down). If a jar doesn't vacuum, it should be stored in the fridge and consumed first.
  9. Both liqueur and jam must be stored in a cool dry place.


This sweet is not exactly like a jam. It is thicker and also has a slight Cachaça flavor, but it no longer contains alcohol, as it evaporates during boiling. It's a great sweet to fill cakes, but also to put on cookies or mix in yogurt.

And so, nothing is lost, everything is transformed!


If you make these recipes at home, feel free to share experiences, here on the blog or on our Youtube channel!


Here is our video!


How to Make Fruit Liqueur  | How to Make Jam with the Leftover Fruit of the Liqueur


Wild Blackberry Jam - Homemade Super Delicious Recipe

It was back in the summer that we made this wild blackberry jam and today we share with you our recipe.

Making jams from wild berries is a fun activity to do with the family. We picked the blackberries from the brambles that insist on growing in our garden, but if you don't have a garden you can take a walk in the countryside or in the woods, pick the fruits and then make several types of sweets.

Let's see how to make this recipe. At the end of this post you can also see our educational video where we show, not only the step by step recipe, but also a little of the development of the plant, from the flower and pollination to harvesting the fruit.


Ingredients

  • 2Kg Wild blackberries
  • 1,3Kg Brown Sugar
  • 3 Cinnamon sticks
  • Juice of 2 small lemons


Tools

  • 1 Large deep pot
  • 1 Hand blender
  • 1 Citrus squeezer
  • 1 Large wooden spoon
  • 1 Kitchen tongs or 2 large spoons
  • Several pre-sterilized glass jars
  • Utensils for pouring the jam into the jars. Depending on the size of the jars, these can be spoons, funnels, or whatever else you have in the kitchen that might come in handy for this task.


Method

  1. Start by washing the blackberries.
  2. Place the blackberries in a deep pot.
  3. Add 3 cinnamon sticks, the sugar and the lemon juice.
  4. With a large wooden spoon, mix everything.
  5. Turn on the heat to high.
  6. When it starts boiling, lower the heat to minimum.
  7. After 10 minutes, remove the cinnamon sticks using a kitchen tongs or two large spoons.
  8. Let simmer for 40 minutes and stir occasionally.
  9. After 40 minutes turn off the heat and transfer the jam immediately to the jars so they can be vacuum sealed.


Important Tips

Before turning off the heat you should check if the jam is just right, in other words, if it is thick enough. If it is still too liquid, you should leave it on the heat a little longer. If, when passing the spoon over the jam, it forms a fine thread, it is ready. Be careful not to make it too thick!

To vacuum seal the jars, you must transfer all the jam immediately while it is still very hot, close the jars tightly, and store them upside down so that all the air can come out of the jars. When vacuum happens, you hear the lid make a clicking sound. You can also tell if it has vacuumed if the lid is sucked down. Jars that don't vacuum should be stored in the refrigerator and be the first to be consumed. Those that vacuum can be stored in a cool, dry place and can last for several years.


This recipe is made with blackberries, but the same method can be followed for other berries. We hope you enjoy it! 

Here is our step by step video and some beautiful images of the blackberries developing before the harvest.


VIDEO - Wild Blackberry Jam - Homemade Super Delicious Recipe


Olive Oil: The Soul of Food | The Properties and Production of Olive Oil, Olive Tree to Table!

The soul of food, green gold, and even gold for the poor! It has been called many things but certain is that olive oil is an indispensable element in food and its properties have been known and appreciated since ancient times. Olive oil was used not only in food, but also as an element of medicine and religious rites, as a beauty ingredient, as fuel for lighting and heating, and even as a lubricant for hardware and agricultural tools. As versatile as it gets!

Many years ago, in the early days of our blog, we launched the post Olive Harvest, where we showed, in a simple way, how the harvest is done. In this post we will talk about the benefits attributed to olive oil and show how it is produced. At the end of the post, watch our video where we show all the stages of olive oil production, olive tree to table.


Properties and Production of Olive Oil


What is Olive Oil and What Kind of Olive Oil to Eat?

Olive oil is the most characteristic element of the Mediterranean diet, which is considered one of the most complete and healthiest in the world. In such a way that, in 2013, the Mediterranean Diet was declared Intangible Cultural Heritage of Humanity by UNESCO.

Olive oil is obtained from the pressing of olives. It is widely used, not only in cooking but also in natural soap and cosmetics. Curious? Check out our video Olive Oil Soap: How to Make It and Its Benefits.

The healthiest olive oil is cold-pressed extra virgin olive oil. In this method, the olives are pressed right after they are picked and do not go through any kind of industrial processing, which makes this type of olive oil keep its nutrients and be the best in food and health.

Olive oil can be consumed immediately or can be left to mature. The taste and acidity of olive oil depends on several factors, such as air temperature, rainfall, humidity, how mature the olives are when they are harvested, and how long the oil has been maturing. When consumed immediately it can have a so-called "green taste". The best olive oil should have an acidity of less than 0,8%.


Benefits and Properties of Olive Oil 

Olive oil is a healthy fat and its daily consumption has several benefits for both physical and mental health. Although there is some discrepancy regarding the daily quantity to intake, overall the recommendation is between 1 to 3 dessert spoons per day.

Although olive oil can be used for cooking and seasoning, it is recommended that preference be given to consuming olive oil in its purest state, i.e. without heating, so that it retains maximum nutritional properties. However, despite this recommendation, it is important not to be extremist and to remember that olive oil is a very versatile oil that can and should be used in all ways that benefit our health. 

Olive oil can also be mixed with herbs in food to further enhance its properties, and can also be macerated with herbs and plants for other medicinal purposes. To learn how, check out our video How to Make a Maceration - DIY Herbal Infused Oil.


Now check out our infographic with the benefits and properties attributed to olive oil.


Olive Oil Properties de Blog da Horta Biológica


Olive oil is one of the anti-inflammatory foods. However, it is important to remember that the consumption of olive oil alone is not enough to obtain all its benefits. It is very important to eat a healthy and balanced diet. For detailed information about these foods, you may like to read our post Anti-inflammatory Foods For Disease Prevention and Strengthening the Immune System


Olive Oil Production, Olive Tree to Table!

Now that we've spoken about what olive oil is, what kind of olive oil to consume, and what properties it has, we are going to show all the production phases. Have you ever seen how the olives are harvested and how the oil is extracted in the press? Watch our video where we show you everything!


VIDEO - Olive Oil: The Soul of Food | The Properties and Production of Olive Oil, Olive Tree to Table!


How To Make Smudge Sticks | Homemade Natural Incense with Herb Bundles

Throughout the year there are many plants that can be collected directly from nature and used in various ways for physical and emotional well-being. In today's post we will show you how to make natural incense at home, in a simple and economical way, using seasoning herbs. At the end of the post you can also watch our educational video explaining how to make these smudge sticks step by step.


Herb bundles can be made for many purposes. Some people make them as a form of aromatherapy, to purify the air, or to clear energies from closed spaces. Whatever the reason for making homemade incense, it is always an excellent opportunity to take a walk in the countryside and collect these herbs that, besides incense, can also be used for cooking or making tea. 

Each plant has its own properties and can be used for a different purpose. Here are just a few examples:


Thyme. Improves mood and increases serotonin and dopamine levels.

Rosemary. Is refreshing, improves the ability to concentrate and has an air purifying action.

Mint. Helps relieve nausea and motion sickness, fights fatigue, and increases energy.

Lavender. Has a relaxing and antidepressant effect.

Oregano. Strengthens the immune system and helps eliminate viruses and bacteria from the air.

Fennel. Promotes well-being and increases self-confidence.


These are just a few examples of plants that can be used in home made smudge sticks. Now let's see how to make and use these herb bundles.


How to Make


Smudge sticks can be made with fresh or dried plants, but it's easier to make while the plants are fresh and flexible. They can be made with just one plant or a combination of several plants. So let's see how to make them:

  1. Choose the plant and cut stems of the same size (more or less 20cm).
  2. Compact the stems with your hands.
  3. Tie one end with cotton thread or other natural material.
  4. Pass the thread tightly around the plants.  
  5. Repeat the thread in both directions. After drying the plant loses volume, so the thread must be very tight.
  6. At the end, make a knot so that the smudge sticks can be hung while drying.
  7. Leave to dry, hanging in a well-ventilated place, away from sunlight. Drying time depends on air temperature and humidity, but can take at least two weeks. 


How to Use


Herb bundles should only be used when the plants are very dry. 

To use, simply burn one end of the smudge stick. As with normal incense, you only have to burn the end for a few seconds. Then just let the aroma spread through the air... and enjoy!


This is a great way to enjoy nature both in and outdoors :)


Here's our step by step video to make smudge sticks.


How To Make  Smudge Sticks | Homemade Natural Incense | Herb Bundles


Fennel (Foeniculum vulgare) - From Cultivation To Harvesting

Fennel (Foeniculum vulgare) has been highly appreciated since ancient times in several countries of Europe and the Middle East. It is a very aromatic plant and full of health benefits. It is antibacterial, antispasmodic and is used mainly to relieve digestive system problems such as flatulence, indigestion, inflammation, sickness, diarrhea, and bad breath. In Portugal it is very easy to find this plant in vacant fields and it can also be grown in the garden or in pots. 


In this post we are going to speak precisely about the cultivation of this plant. Watch our infographic to know how to grow fennel and, at the end of the post, our video where we show you how to harvest fennel in the spring and fall/autumn.


Fennel de Blog da Horta Biológica


VIDEO - Fennel (Foeniculum vulgare) | How To Harvest Leaves and Seeds | Harvesting in the Spring and Autumn/Fall


Anise (Pimpinella anisum) - From Cultivation To Harvesting

Anise (Pimpinella anisum), also known as aniseed or anix, is a plant native to the Mediterranean basin and Middle East and, due to its therapeutic properties, is especially used to relieve various problems of the digestive system, such as indigestion, swelling and gastritis. It is a very aromatic plant and its fruits (or seeds) are used to make tea. When grinded they are also used for making of liqueurs, sweets and other cooking.


In order not to make this post too long, we will talk about the properties of anise in another post and we will now focus on how to grow this plant. At the end of the post you can also watch our educational video, which we filmed over 4 months to show all the stages of development of the plant, from cultivation to harvesting and conservation.


It is important to say that the approximate yield of anise is from 600kg to 1ton/ha, which becomes a low yield when grown in a pot, so it is advisable to prepare several pots or cultivate in a larger area of the garden to obtain a good quantity of seeds. Check out our infographic with the specifications for growing anise.


Anise - From Cultivation To Harvesting de Blog da Horta Biológica 


VIDEO: Anise (Pimpinella anisum) - From Cultivation To Harvesting


How To Make Hydrosol | Floral Water

Making hydrosol is an excellent way to make the most of the medicinal properties of plants, both in physical and emotional health. The well-being that this activity provides is undeniable. From the contact with nature during the harvesting of the plants, to the wonderful aroma it leaves in the air during distillation, and its various forms of use, making hydrosol is a beautiful way to take care of ourselves and those that are dear to us. 


For this post we have made rosemary hydrosol. We will explain what hydrosols are, how they are made, and how they are preserved. At the end of the post you can also watch our video where we show you how to do it, step-by-step.


What are Hydrosols?


Hydrosols, also known as floral waters, distillates or hydrolates are obtained by steam distillation. They are, in fact, a by-product of the distillation process of essential oils. They are very aromatic and refreshing and have medicinal and therapeutic properties. They are used in personal care, especially for people with sensitive skin. So let's find out what it takes to make hydrosols.


Required Materials


  • 1 Stainless steel pan with lid
  • 2 heat resistant glass containers (both must be of a suitable size to fit inside the pan)
  • Ice cubes and freezer bags
  • Funnel
  • Amber glass bottle (previously sterilized)
  • Label for the bottle


Required Ingredients


  • Distilled water
  • Fresh or dried plants (we used freshly harvested rosemary)


It is not necessary to have an exact amount of plant and water. Depending on the amount of plant available, you choose the size of the pan and the amount of water. 


How To Do It


The method we will show you is homemade and very simple.

  1. In the middle of the pot, place one of the glass containers facing down.
  2. Spread the plants around the container (a sufficient amount of plants should be placed to cover the sides of the container).
  3. Add distilled water (enough distilled water must be added to cover the plants and sides of the container).
  4. Place the other glass recipient on top of the container facing upwards. This is the container that will collect the floral water.
  5. Place the lid (inverted) over the pan.
  6. Place a bag of ice cubes on top of the lid. It is important to have some ice cube bags prepared in advance, as during the distillation process the ice will melt and it will be necessary to change the bags.
  7. Leave on a low heat for about 45 minutes.
  8. The heat below and the ice above cause condensation inside the pan and the hydrosol, which also contains small particles of essential oils, will be collected inside the glass recipient.
  9. After 45 minutes, turn off the heat and let it cool.
  10. With the help of a funnel, pour the hydrosol into an amber glass bottle.
  11. Place a label with the name of the hydrosol and the date it was made.


Amount of Hydrosol


The final amount of hydrosol will always vary according to several factors, such as:

  • The amount of plant available.
  • Whether the plant used is fresh or dry.
  • If the plant is fresh, the amount of water in its composition depends on factors such as rain, air humidity, and soil. Even though plants may be removed from the same bush time after time, the end result may not always be the same.


To know the approximate yield, one can weigh the initial amount of plant and the final amount of hydrosol. However, as we said before, the results may always vary.


If, at the end of the 45 minutes, there is little hydrosol, you can continue to add distilled water inside the pan and continue the process for a few more hours. It is important to always be around to change the bags with ice cubes and check whether it is necessary to add more water inside the pan.


How to Store


The best way to preserve hydrosols and prolong their shelf life is in glass bottles, in a dark and cool place. They can be stored in the refrigerator, but never in the freezer. In these conditions they can last up to 2 years. For more information on how to preserve hydrosols, visit our post How To Preserve Hydrosols and Prolong Their Shelf Life.


Ways of Use


As we mentioned, hydrosols contain the properties of plants and, because they are so soft, they are excellent for those with sensitive skin. They can be used in various ways:

  • Natural soap
  • Facial toner
  • Hair care
  • Formulation of facial and body moisturizers and lotions when added in the aqueous phase of emulsions
  • Aromatherapy


Making hydrosols is very simple and is a way of leading a more natural life. Try it and you will look no further! :)


If you liked this post you may also like our post How To Make Hydrosol with an Alembic.


Check out our video where we show you how to do it in a practical way. If you haven't subscribed to our Youtube channel yet, take the opportunity to do so to receive, first hand, our content about the incredible world of plants!


VIDEO - How To Make Hydrosol | Floral Water


Harvesting and Extraction of Raw Honey

Written by: Ana Pereira

Tags: Sustainable Beekeeping, Raw Honey, Beeswax, Eco-living Practices, Organic Farming, Honey Extraction Methods


Have you ever seen how honey is harvested? 

It's a truly fascinating process, and in this post we’re going to walk you through each step – from opening the hive to obtaining raw, wonderful honey!

At the end of the post, don’t miss our video where we show all the stages, from harvesting and centrifuging to filtering and storing the honey.


Whether you're simply curious about beekeeping or thinking about getting started yourself, we’ve put together a range of tips and practical advice to help you achieve a successful honey harvest.


When To Harvest?


The honey should be harvested at the height of summer, once the flowering season has come to an end – usually from July onwards.

We carried out our harvest in August, after making regular visits to the hive throughout the year to ensure the bees’ wellbeing.

The honey should be collected during the day, when most of the colony is out foraging in the fields. This usually happens during the hottest hours of the day. By the evening, the bees return to the hive and no longer leave once night falls.


What Equipment Do You Need?


It’s important to have all your equipment clean, organised and ready to use before heading out to the apiary.


Here’s a list of the clothing and tools you’ll need:


Clothing
  • Beekeeper suit
  • Thick gloves
  • Boots or closed footwear

Equipment
  • Hive tool 
  • Smoker + lighter (Optional. Be careful with fire!)
  • Bee brush
  • Scraper
  • Box for transportation of frames (Optional)
  • Uncapping knife (can be electric or manual)
  • Filters
  • Extractor 
  • Glass jars for storage


How To Harvest?


  1. Wearing all the necessary protective gear, start by opening the hive. You should position yourself either behind the hive entrance or to the side.

  2. After removing the lid, use a hive tool to inspect each frame one by one in each super (or half-super, depending on the type of hive). Some beekeepers use a smoker to gently move the bees away. We’ve stopped using one to reduce the risk of wildfires.

  3. Select the frames to be removed based on how much honey is stored in the combs.

  4. Before leaving, carefully close the hive again, taking care not to crush any bees.


How Much Honey Should You Take From The Hive?


Bees produce more honey than they consume, but the beekeeper should never take more than 30% of the honey to avoid putting the colony’s survival at risk.

The larger box at the bottom of the hive is the brood box, and honey should never be taken from it. In addition to the brood, it contains stores of honey and pollen that serve as food for the bees during the winter months.


Transporting The Frames To The Extraction Area


There are two ways to transport the frames. You can either carry the entire super (or half-super), or place the frames in a separate box, which helps reduce the number of bees taken away from the hive.

We remove the frames one by one and use a special bee brush to gently remove any bees. Each frame is placed into the box, and we always keep the lid on to stop the bees from getting back in. Trust us – you really don’t want to bring them home with you!

We then carry the box close to the extraction area and carefully inspect it to make sure no bees remain inside. If there are, they’ll signal the rest of the colony and attract the swarm to wherever the honey is.


Centrifuging


The extractor can be either electric or manual, and it should be thoroughly cleaned and ready to receive the honey beforehand.

  1. Using an uncapping knife, uncap the wax cappings on both sides of each frame and place them in the extractor. The centrifugation process will spin the honey out of the combs.
  2. After centrifuging, the frames should be placed back in the box or super to return to the hive.

The frames must be returned to the hive just as they are – 
with the wax combs still intact – because if we replace them with fresh wax sheets, the bees will need to consume more honey to rebuild the combs. This way, we’re saving them the extra work!


Filetring


  1. For filtering, two filters are used to separate the honey from the wax, along with a large container to collect the honey.
  2. Simply open the outlet tap of the extractor and let the honey and wax flow out.
  3. The wax remains in the filters, while the honey collects in the container.

Once the honey is clean, it can be stored.


Storing


Honey should be stored in well-sealed glass jars, kept in a cool, dry place. If stored somewhere too cold, it will become almost solid and difficult to spoon out. That’s what happens when the honey is pure and raw!


What Is Raw Honey?


Raw honey is honey as it is extracted from the hive, without undergoing any industrial processing.

Honey sold on a large commercial scale often goes through refining processes that make it clearer and more appealing to consumers but remove beneficial nutrients such as pollen, enzymes and antioxidants. It is also known that sugars and other sweeteners are sometimes added to commercial honey to reduce production costs.

There are several ways to distinguish raw honey from processed honey, which we will cover in another post to keep this one from becoming too long.


What To Do With Beeswax?


The beeswax left in the extractor and filters can be melted and purified for use in making artisanal products, such as soap, cosmetics, and candles.

Check out our post and video How To Clean Beeswax to learn how to melt, filter, and store this wonderful natural product.


For a better understanding of the whole process, watch our educational video where we show the step-by-step honey harvest.


VIDEO - Harvesting and Extraction of Raw Honey